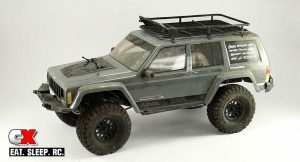
 While I’m a racer at heart, there is a segment of RC that has successfully wedged its way into my RC timeline – scale trucks. I’ve been wheeling around a stock Axial Racing SCX10 II now for some time, enjoying it’s incredible ability to make it’s way up or over almost any (scale) obstacle. Then there’s the fact that I’m out in the great outdoors; this sector of the industry gets you away from enclosed buildings and out on the rocks and trails.
I’m also enjoys customizing my cars, but I’ve put off modifying the SCX10 II since it’s really a great truck in RTR form. But, alas, the time has come. Parts have been stacking up and I think I’m ready to pull the trigger on Part 1 of my SCX10 II upgrade. We’re going small at first, only adding a couple parts I feel will benefit the truck, so let’s rock and roll!
Modifications
 Chassis & Suspension
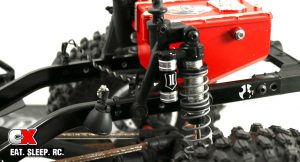
Both the chassis and suspension on the SCX10 II are fantastic, so much so that I didn’t think that either needed much work. I did swap out the stock, plastic shocks for a set of Axial’s Icon 61-90mm Aluminum Shock Set. These shocks have aluminum bodies and will be much more durable in the event of a large crash or drop from the top of a tall rock. They also have a faux reservoir on the side, giving them a touch more scale appearance.
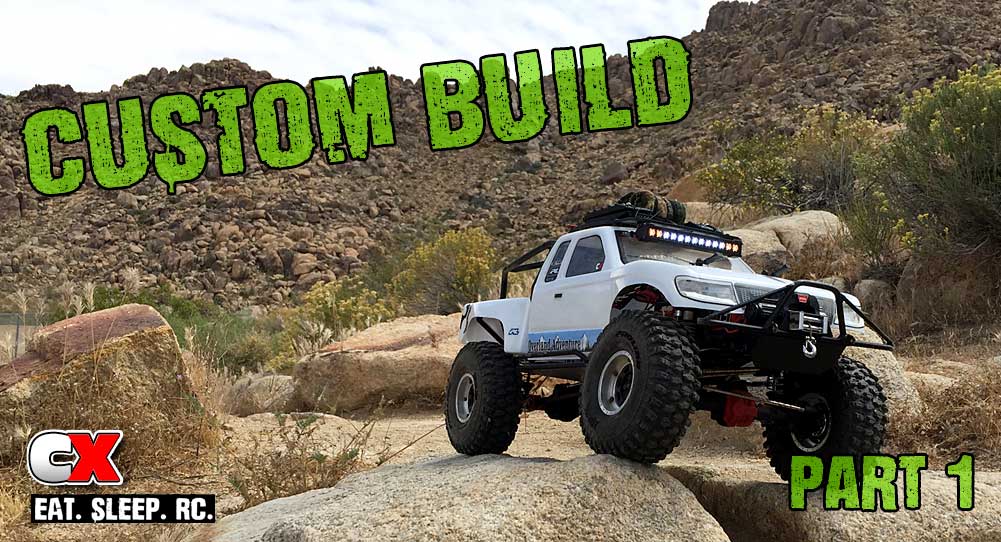
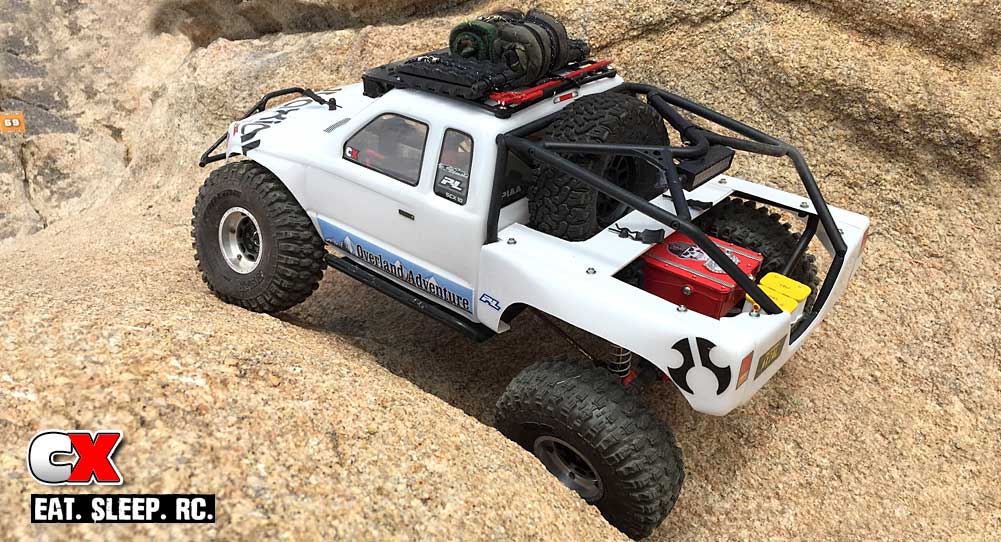
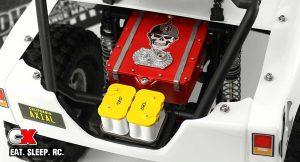 My idea with this truck is to do as many trails as possible, however I don’t really want to carry a ton of parts every time I head out. My solution was to make some sort of case on the truck itself – it just so happened I had an Axial Yeti Fuel Cell sitting out on the bench right next to me. I sized it up and noticed that the mounting pins on the fuel cell lined up perfectly with holes in the shock tower supports. After adding a pair of screws and cone washers, I had a bad ass looking parts compartment. I did have to modify the Honcho cage a bit to make it fit, but I think the end result is very PreRunner-ish for sure!
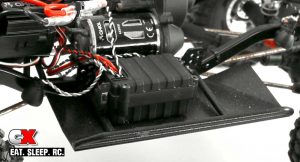
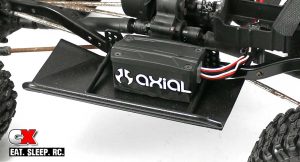 One major modification was the addition of a set of SCX10 II Double Bar Rock Sliders from ScalerFab. These sliders are hand-welded steel parts with steel skid plates added for additional underside protection. They bolt right up to the factory mounts; that’s the good news. The bad news is that replacing the stock sliders also meant losing my waterproof receiver box … or did it? To remedy this, I started hacking away on my stock slider until all I had left was the receiver box. I applied a liberal amount of 3M Permanent Outdoor Mounting Tape and stuck the box back on the chassis – wah lah – waterproof receiver box back in action.
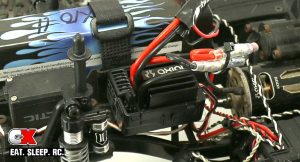 Since I was moving things around, I decided to relocate the ESC as well. The SCX10 II has a spot right behind the steering servo that allows you to mount a servo winch setup. I made my own mount out of some Evergreen PolyStyrene Plastic and attached it to the servo mounting location. This provided a nice, stiff pad to mount the ESC and is still within range to plug everything in.
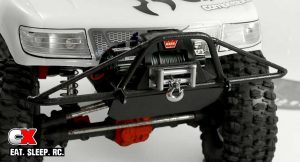 The final modification to the chassis was the addition of a ScalerFab PreRunner Series SCX10 II XJ Front Bumper. I ordered one of these up prior to swapping bodies but when matched up with the Honcho, it still looks great! I made sure the bumper included a winch mount; I needed a place to mount my winch setup! This setup consists of a trio of RC4WD parts; 1:10 Warn 9.5cti Winch, Black Foldable Winch Anchor and 1:10 Warn Wireless Remote/Receiver Winch Controller. This 3-pack is something every scaler needs to help them get out of any predicament. Trust me, I know.
I’m sure by now you’ve also noticed the rusty links under the chassis. Yes, yes, I know, they don’t look the greatest, but they work great so I didn’t really see a need to upgrade them … yet. I’m saving those for Part 2.
Electronics
Like the chassis and suspension, the stock RTR electronics are perfect in the SCX10 II and I didn’t feel like they needed an upgrade right off the bat.
The AE-5 ESC is waterproof and can handle a 3S LiPo, both great features in my book.
The Tactic TSX45 servo has plenty of torque (151oz to be exact) and even survived some brutal front end hits, so I’m saving that for an upgrade. The plastic servo horn took a beating and I can see some white stress marks in it, so a metal horn is definitely in this truck’s future.
The 35T brushed motor did a great job pulling the SCX10 II around on the rocks, but get out into the open and it’s more tortoise than hare. This is fine if you’re with trucks sporting that same kind of speed, but I was crawling with someone that had a bit more motor and he kept having to wait. I’m a little undecided if I should stay in this range or drop in something like a 20T motor. Decisions decisions.
 Body
Body
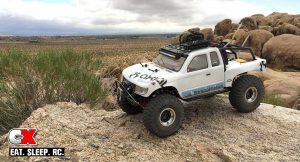
I’ve always been a huge fan of the Honcho body, so it was a no-brainer when it came time for a body change. I already had a freshy white one sitting in my garage, but I wanted a little different look at the back of the rig than just the stock cage. I ordered up a set of Dinky RC’s Honcho Bedside Kit; basically 3 Lexan pieces that form a truck bed. They come clear without mounting holes so you can paint them up however you want and mount them to the existing holes in the cage.
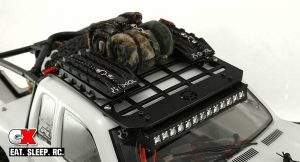 Other modifications included moving the spare tire to the backside of the cab, using a long screw to keep it in place. I mounted a Gear Head RC Slim Line Bomber Roof Rack to the roof which allowed me to attach a couple accessories, including a pair of sleeping bags and sand ramps. Why a Bomber roof rack instead of the one designed specifically for the Honcho? One good reason – the Bomber rack is a little longer so I can attach the light bar UNDER it. While I’m not planning to crash alot, it’s going to happen, and having the light bar under the rack will help protect it.
Final touches to the Honcho body include the addition of a pair of Pro-Line Racing Dry Cell Batteries from their Scale Accessory Assortment #6. I mounted these to the rear of the Honcho cage with some Shoo Goo. That stuff works wonders!
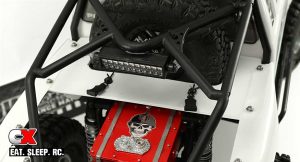 Now, I did have a bit of an issue when it came to mounting the body. Eliminating the stock plastic bed ‘insert’ effectively removed the stock mounting system. Not to fear, I have more Evergreen PolyStyrene Plastic! After modeling up the basic framework using some spare Lexan, I widdled up a very strong mount using two pieces of PolyStyrene and attached it to the existing holes in the cage. It’s actually quite robust, as witnessed from the numerous tumbles and spills during it’s first outing!
 Wheels and Tires
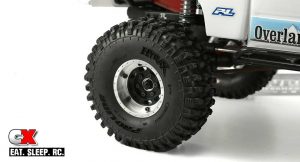
Custom wheels and tires are, of course, a necessity when it comes to upgrading your ride. For this build, I went with a set of wheels I’ve been drooling over for quite some time, Gear Head RC’s 1.9 Trail King EZ-Loc Wheels. I had a set of something similar on my real truck long ago and have always loved the look, so I was pretty stoked to see tiny replicas.
To improve grip, I wrapped my Trail Kings with a set of Pro-Line’s Hyrax 1.9 G8 Rock Terrain Tires. These have a slightly taller profile than the stock tires, giving my SCX10 a little more ground clearance, but what really sets these tires apart is the aggressive tread pattern. Plus, they really give the Honcho a macho look – like, a ‘mancho’ look. That term is now trademarked.
 Lighting
Night driving is definitely in my near future, so the final piece of the pie was a full light kit. This included a set of headlights, taillights, a light bar and rock lights. Other than the Gear Head RC Trail Torch 4″ LED Light Bar (which, by the way, matched up perfectly with the roof rack), the rest of the lights were pieced together using 2 of Axial’s Simple LED Light Sets and 2 Double LED Light Strings (white). Those items will allow you to rock front headlights (two bulbs in each housing), 4 rear LEDs and 4 rocks lights; two up front, two in the rear. To keep everything contained, I grabbed a spare receiver box from an Axial Wraith and, using the same super duper 3M mounting tape, attached it to the left rock slider. This box contains both Simple LED controllers and all the wiring. The lights can be turned on or off with a switch mounted just outside the box.
The Drive
The first drive of this rig was at Pro-Line’s By The Fire event held at Horseman’s Center Park in Apple Valley CA. This was a spectacular event with all kinds of different surfaces to drive on.
As I’m sure you know, the stock SCX10 II is a solid performer, there’s no doubt about that. The addition of aluminum shocks, however, did seem to smooth out the ride a bit, helping to keep all four wheels planted firmly on the ground. The ScalerFab sliders and bumpers got a serious workout and held up great, but are now minus some of the attractive black paint. That just goes to show how much abuse they got, sort of like gaining some battle scars.
The biggest improvement, though, has got to be the wheels and tires. I was told by my buddy Paul Willhite (from Pro-Line) that the Hyrax tires were like cheating – and he’s right. They’ve got grip for days and yanked the SCX10 II around with some authority. Even after a full day of driving on some rather abrasive rock, they still looked great.
 Final Thoughts
While the goal was to not drastically change the handling of the SCX10 II, I did want to give it a custom look that was more ‘me’. I’m happy with the overall project, however there are a few things I’d still like to address before this project is complete. I say that like I feel this project will actually ever be complete – we all know that doesn’t happen very often. Maybe that’s why I’m so drawn to this segment – endless customization.
Well, for now, she’s done. See you soon for Part 2.
Parts Used
Axial Racing, www.axialracing.com
AX90047 Axial Racing SCX10 II RTR
AX30103 Axial Racing Icon 61-90 Aluminum Shock Set
AX31152 Axial Universal Rigid Light Bar Set
AX31125 Axial Yeti Fuel Cell
AX24257 Axial Simple LED Controller w/LED Lights
AX24252 Axial Double LED Light String
Dinky RC, www.dinkyrc.com
Dinky RC Honcho Bedside Kit
Gear Head RC, www.gearheadrc.com
GEA1308 Gear Head RC Slim Line Bomber Roof Rack
GEA1023 Gear Head RC 1.9 Trail King EZ-Loc Wheels
GEA1146 Gear Head RC Trail Torch 4″ LED Light Bar
Pro-Line Racing, www.prolineracing.com
6074-00 Pro-Line Racing Scale Accessory Assortment #6
10128-14 Pro-Line Hyrax 1.9 G8 Rock Terrain Truck Tires
RC4WD, www.rc4wd.com
Z-S1079 RC4WD 1/10 Warn 9.5cti Winch
Z-S1623 RC4WD Foldable Winch Anchor (Black)
Z-S1092 RC4WD Warn 1/10 Wireless Remote/Receiver Winch Controller Set
ScalerFab, www.scalerfab.com
ScalerFab Prerunner Series SCX10/SCX10 II XJ Front Bumper
ScalerFab SCX10/SCX10 II Double Bar Rock Sliders with Skid Plates
Gallery
 CompetitionX CompetitionX is the most up-to-date source for RC Car News, Reviews and Videos for Radio Control. We also have the most comprehensive Manual Database on the web.


