The Build – Part 2
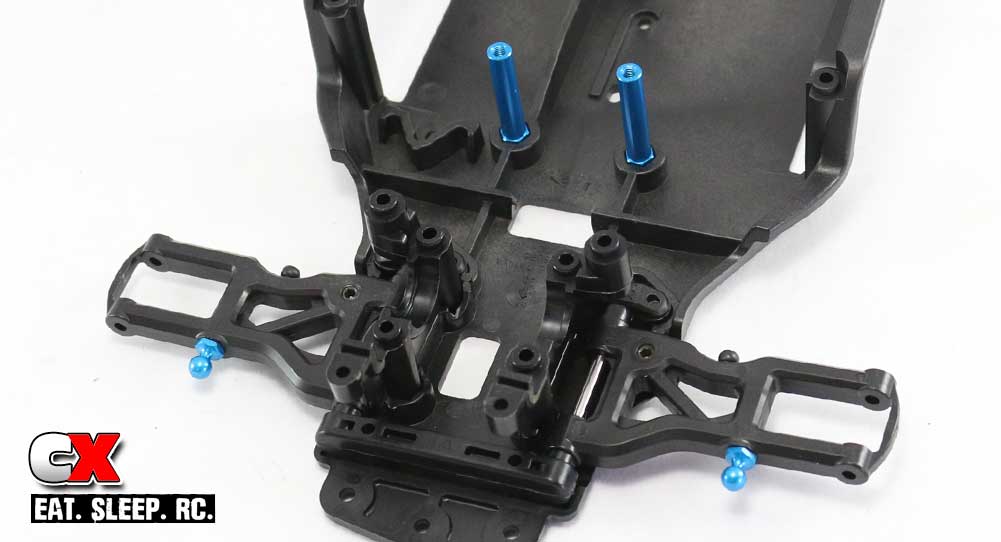
The front suspension build is up next, also pulled from the TRF419. The assembly is very similar to the rear suspension and we’ll be including the steering posts here as well.
 None.
None.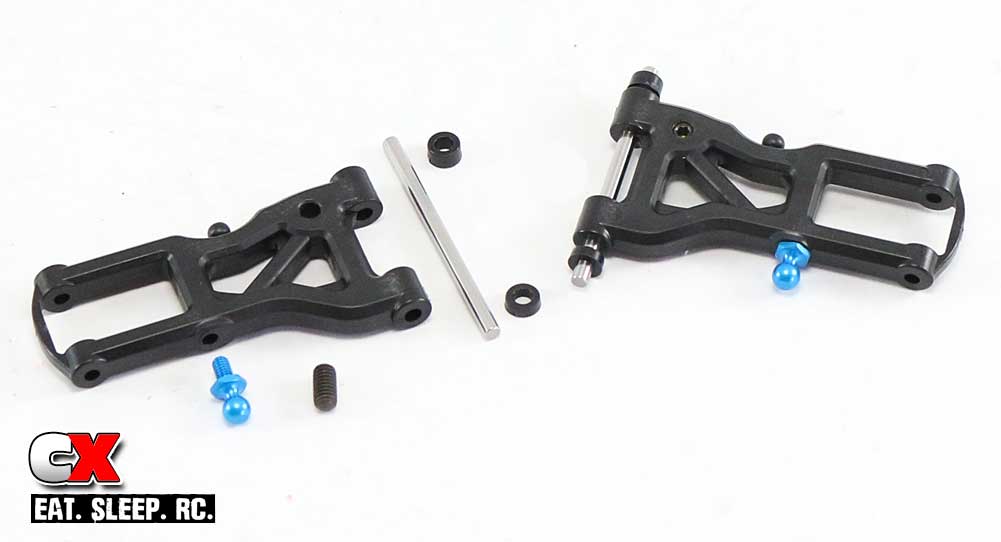
We’ll be assembling the front suspension arms like we did the rears; screw in the droop screw (with 1.5mm sticking out of the bottom) and attach the blue ball ends. Slide the hing pin through and attach the spacers; there are no suspension balls on the front arms.
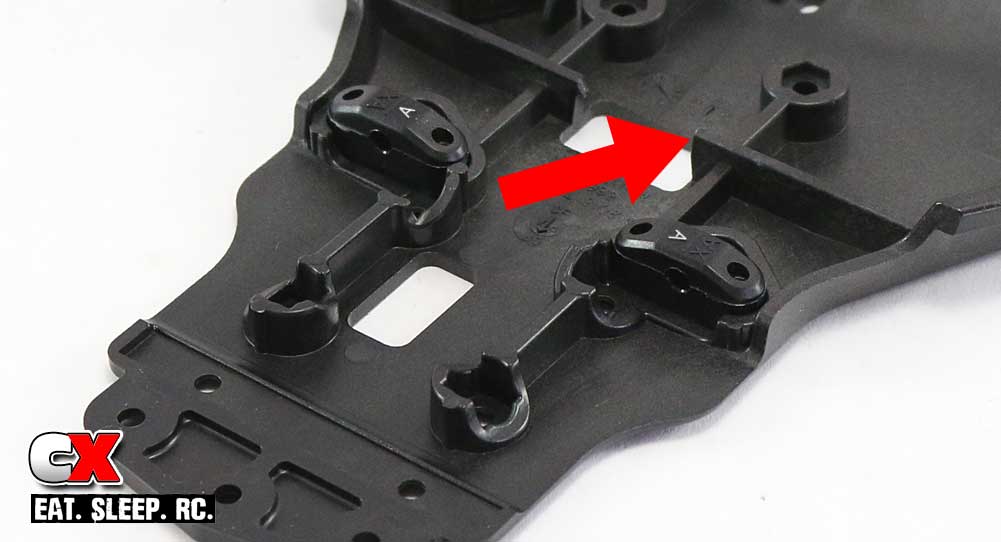
Attach the front B arm mounts to the chassis with the ‘A’ facing in. I’ve highlighted the ‘A’ for reference. Like the rear, cut off the plastic chassis overflow piece, shearing it off at a slight angle as shown.
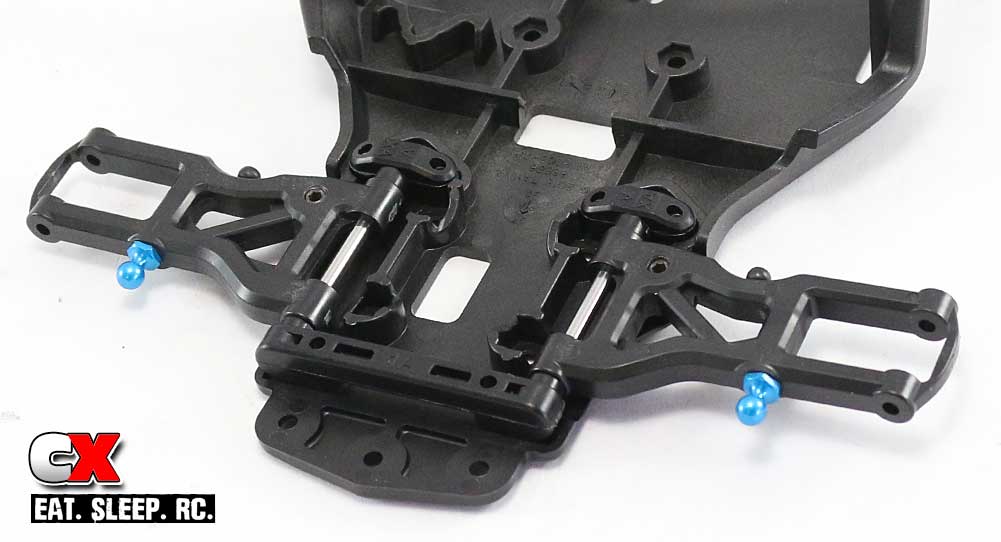
Slide the front suspension arms into place (note orientation) and slip the front 1A arm mount onto the chassis, securing it from the bottom with the pair of 3x8mm screws. Make sure the arms move up and down freely.
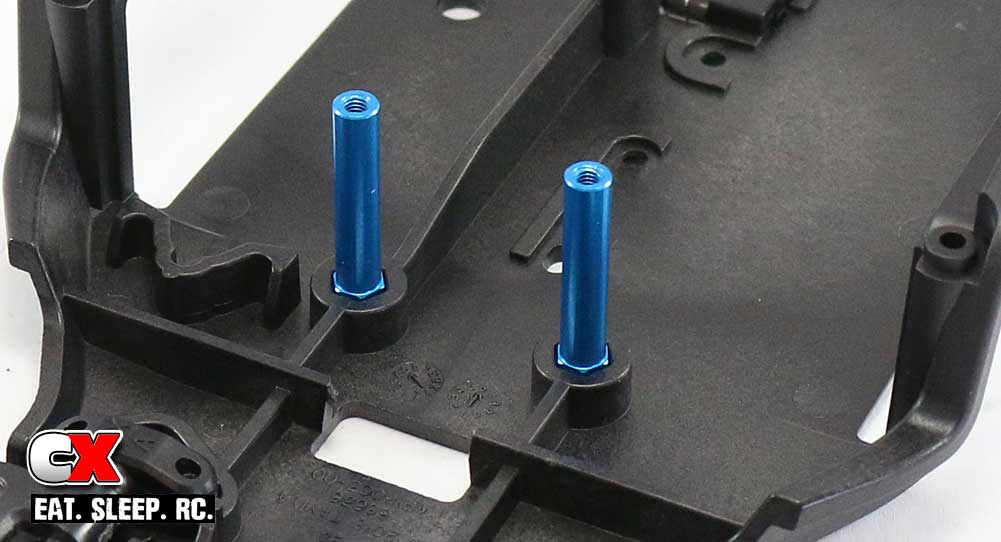
Attach the blue steering posts to the chassis. A light dab of blue threadlocker is suggested here.
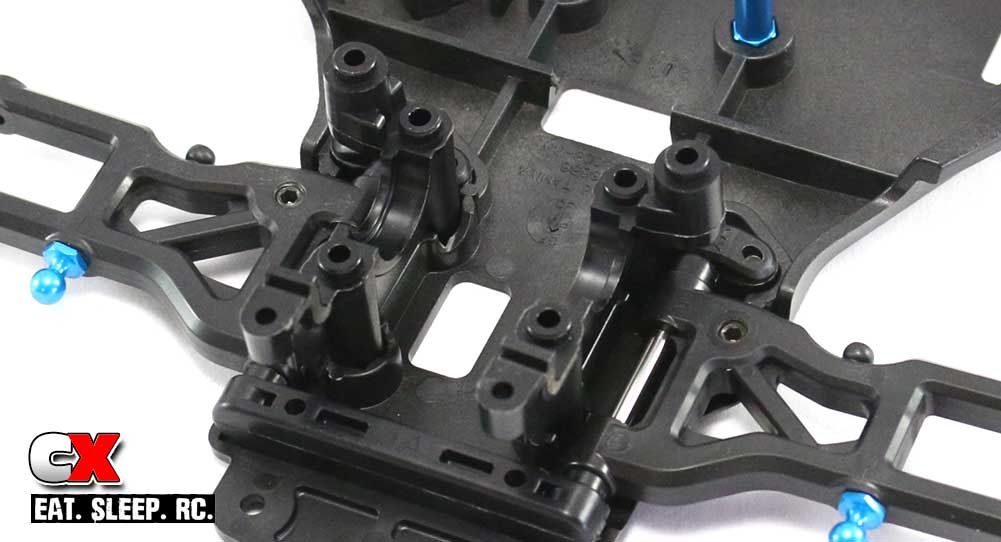
Attach the bulkheads to the chassis. Note the orientation. Do not tighten them down all the way just yet; we’ll do that at a later step.
Part 1 of the front suspension complete. Next up is the motor mount and spur gear assembly.
Tamiya TA07 Pro Build – Part 1 – Rear Suspension
Tamiya TA07 Pro Build – Part 2 – Front Suspension
Tamiya TA07 Pro Build – Part 3 – Motor Mount
Tamiya TA07 Pro Build – Part 4 – Differentials
Tamiya TA07 Pro Build – Part 5 – Motor Mount / Drive Belt
Tamiya TA07 Pro Build – Part 6 – Steering
Tamiya TA07 Pro Build – Part 7 – Knuckles / Rear Hubs
Tamiya TA07 Pro Build – Part 8 – Shocks
Tamiya TA07 Pro Build – Part 9 – Electronics
Tamiya TA07 Pro Build – Part 10 – Wheels / Body Mounts / Battery Tray
 CompetitionX CompetitionX is the most up-to-date source for RC Car News, Reviews and Videos for Radio Control. We also have the most comprehensive Manual Database on the web.
