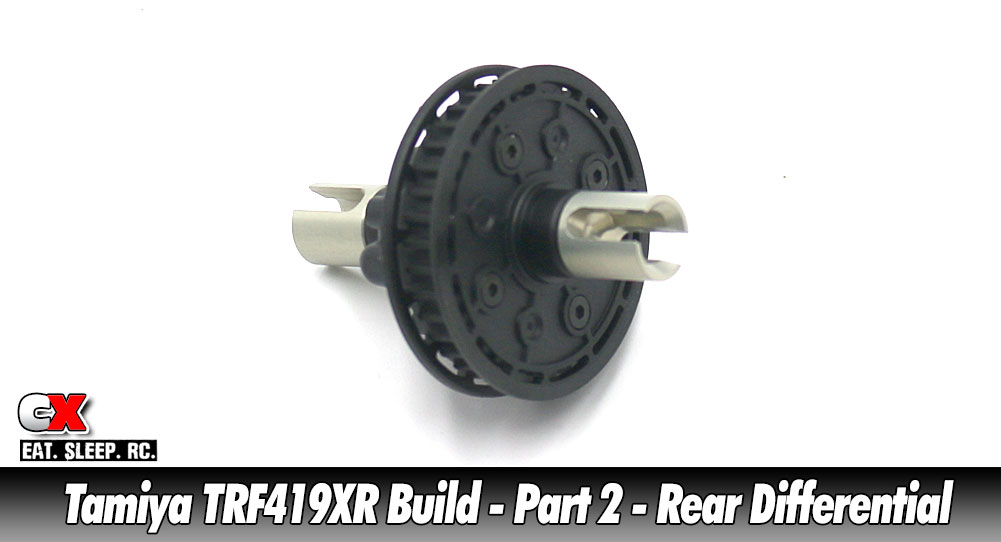
Like most current touring cars, the Tamiya TRF419XR comes with a front spool and rear gear differential setup. The rear is a sealed unit that accepts any diff fluids; we’ll be building ours with 3K fluid to start.
Build Notes:
 As with most differential builds, this could be a messy step if you’re not careful. A covered work area and cleanup rags are highly recommended.
 As with most differential builds, this could be a messy step if you’re not careful. A covered work area and cleanup rags are highly recommended.
Step 1:
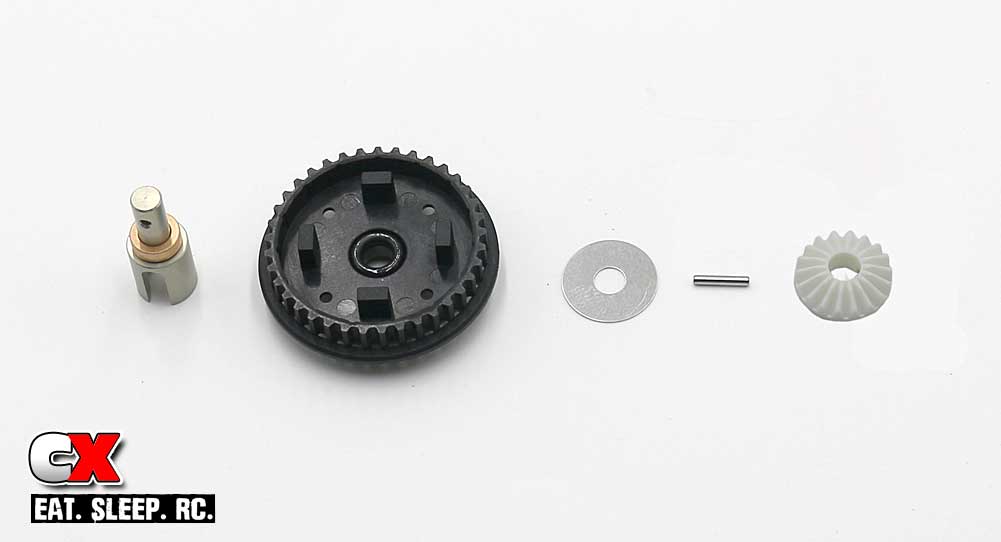
To get this step started, grab an outdrive and slide one of the metal bushings over it. Feed it through the diff pulley, then lube and slide the black o-ring over the outdrive and press it down into the pocket. Follow that with the 5×15 shim. Locate and feed the cross pin through the hole in the outdrive, then key and press the sun gear into place. The sun gear should be flush with the end of the outdrive.

To get this step started, grab an outdrive and slide one of the metal bushings over it. Feed it through the diff pulley, then lube and slide the black o-ring over the outdrive and press it down into the pocket. Follow that with the 5×15 shim. Locate and feed the cross pin through the hole in the outdrive, then key and press the sun gear into place. The sun gear should be flush with the end of the outdrive.
Step 2:
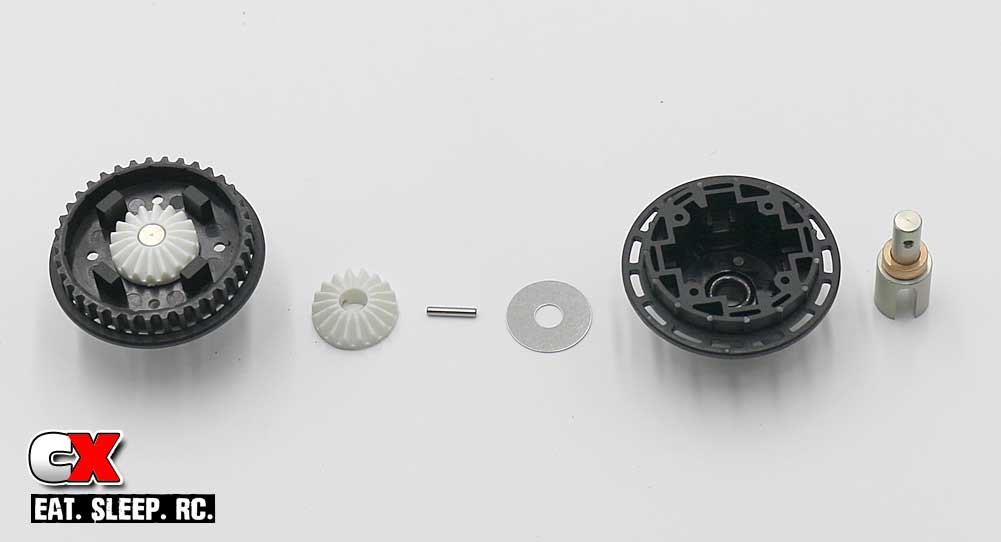
Step 2 is the same as Step 1, just the differential housing side.

Step 2 is the same as Step 1, just the differential housing side.
Step 3:
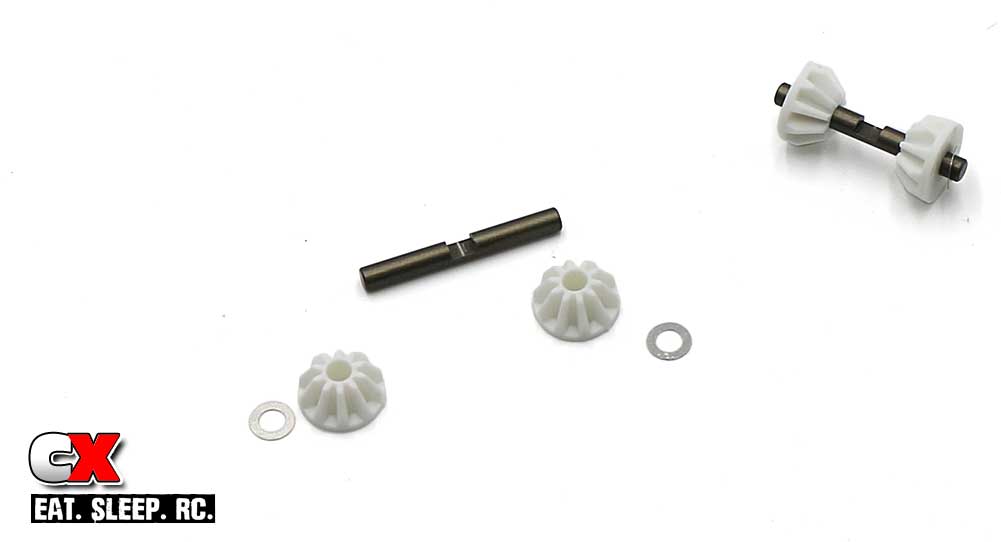
Assemble a pair of cross shafts; each should have a pair of satellite gears (facing inward) and a 3×5 shim (on the outside of the gear). Note the cut in the cross shafts.

Assemble a pair of cross shafts; each should have a pair of satellite gears (facing inward) and a 3×5 shim (on the outside of the gear). Note the cut in the cross shafts.
Step 4:
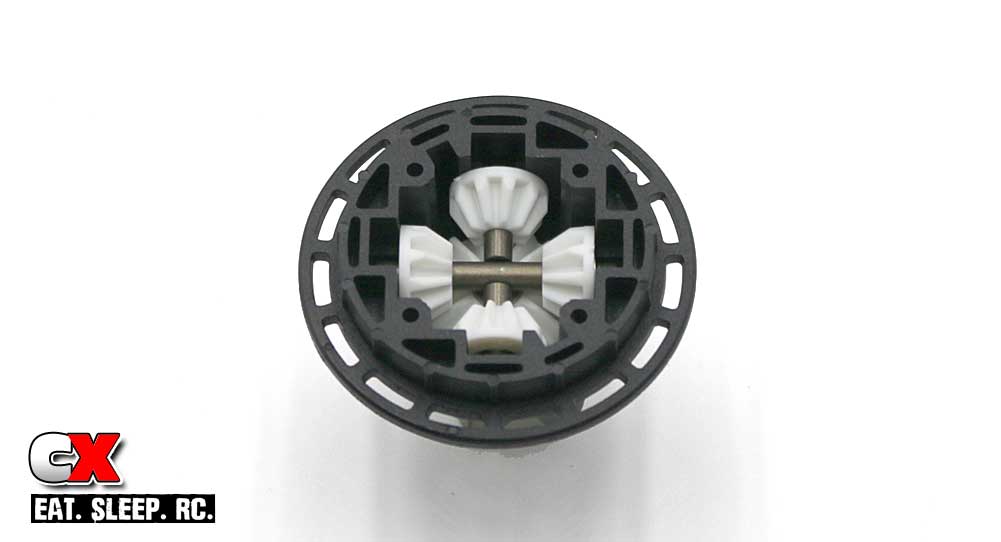
Install both satellite gear assemblies into the diff case; note how the cuts in the cross shafts key together. Rotate the outdrive a couple turns to make sure the gears seat correctly.

Install both satellite gear assemblies into the diff case; note how the cuts in the cross shafts key together. Rotate the outdrive a couple turns to make sure the gears seat correctly.
Step 5:
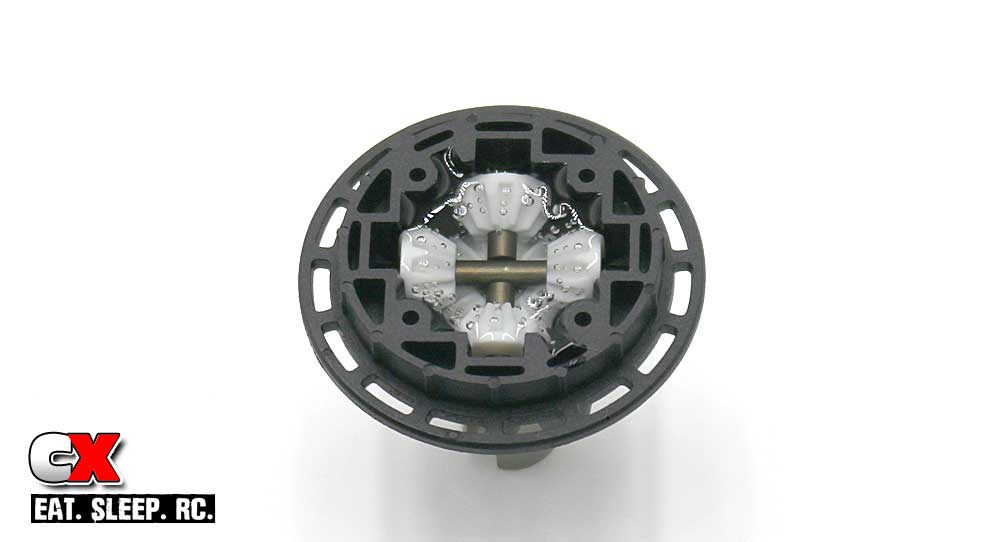
Fill with fluid. You want to put just enough to reach the top of the satellite gears. Wait a few moments for the bubbles to disappear.

Fill with fluid. You want to put just enough to reach the top of the satellite gears. Wait a few moments for the bubbles to disappear.
Step 6:
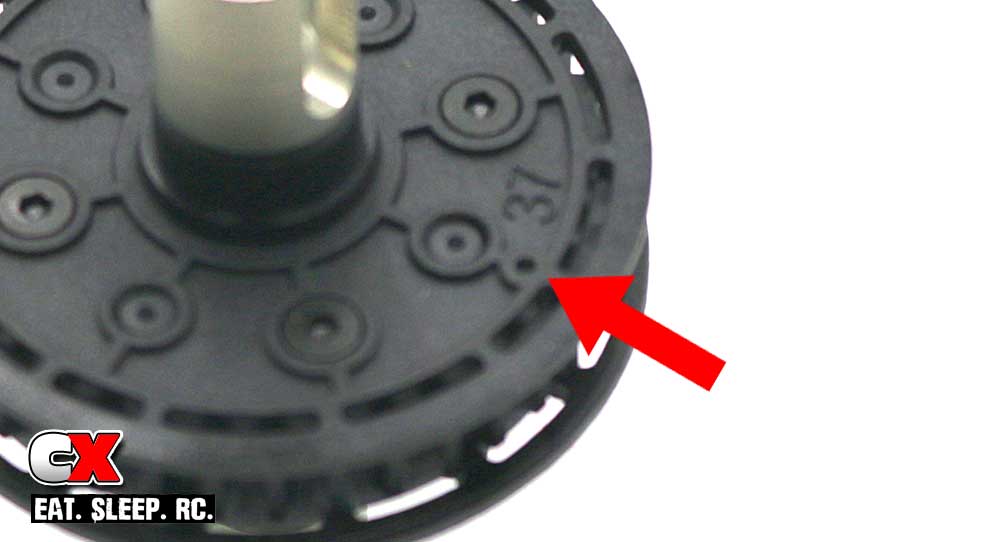
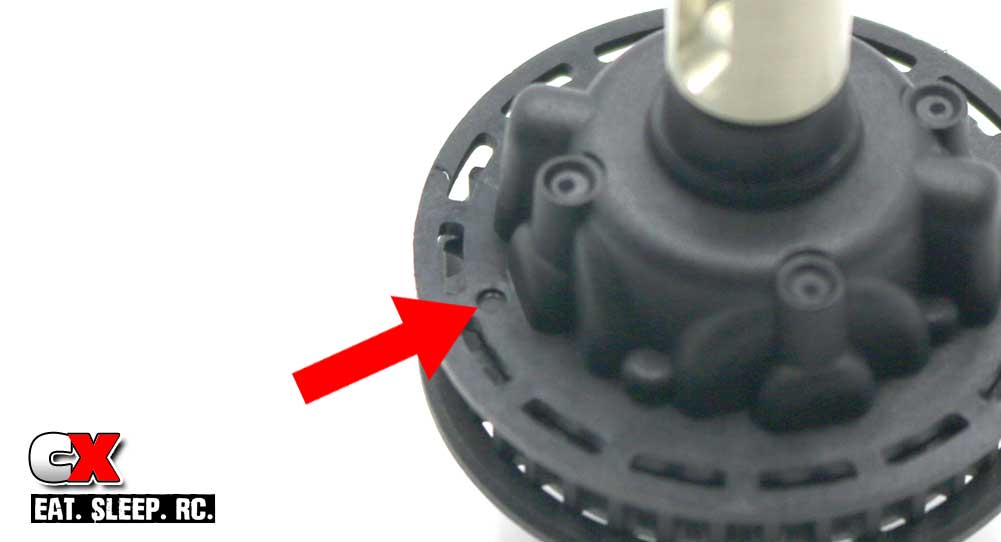
You’re going to match the two diff halves together, however you’ll need to make sure the two points shown above line up. These are the ‘key’ points to make sure diff halves mate correctly.


You’re going to match the two diff halves together, however you’ll need to make sure the two points shown above line up. These are the ‘key’ points to make sure diff halves mate correctly.
Step 7:
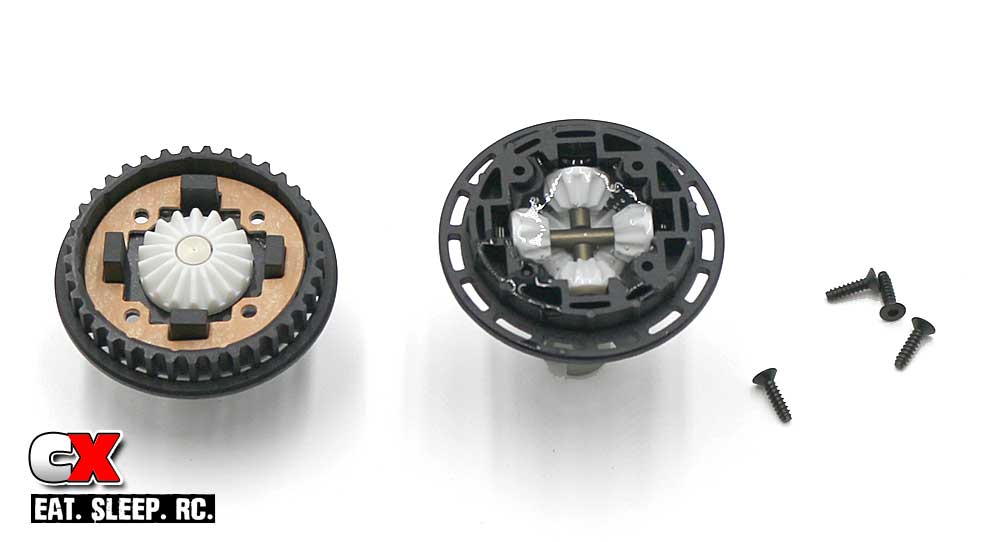
Press the gasket into the diff pulley. Mate the two halves together (see Step 6) and secure with the 4 2x8mm screws.

Press the gasket into the diff pulley. Mate the two halves together (see Step 6) and secure with the 4 2x8mm screws.
Step 9:
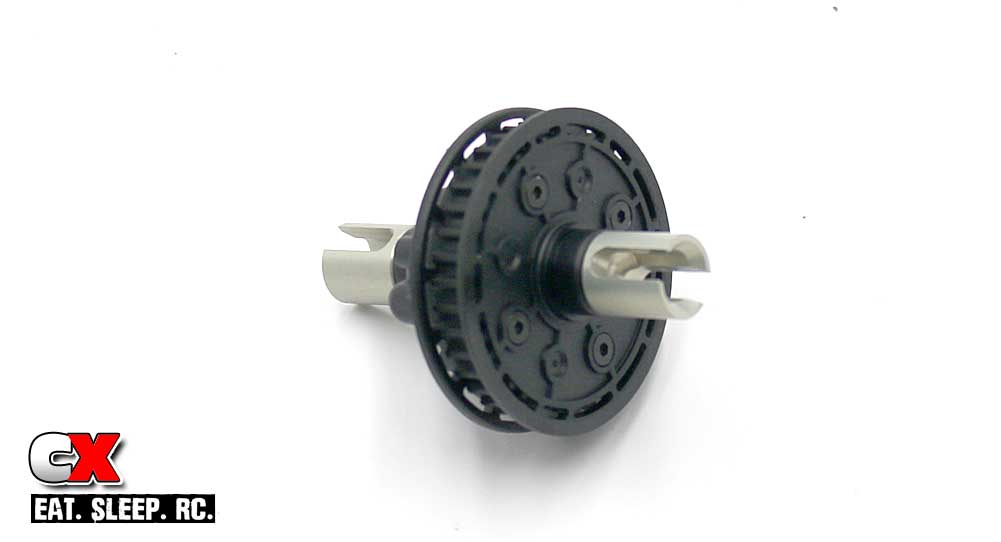
Rear differential done. You can mark the outside of the case with 3K (or whatever you used) for easy reference.

Rear differential done. You can mark the outside of the case with 3K (or whatever you used) for easy reference.
Clean up any excess fluid with a rag and some motor spray, set the diff aside and let’s move to Step 3 – the Driveline.
Use the links below to follow each step.
Tamiya TRF419XR Touring Car Build – Opening Page
Tamiya TRF419XR Touring Car Build – Part 1 – Chassis/ Bulkheads
Tamiya TRF419XR Touring Car Build – Part 2 – Rear Differential
Tamiya TRF419XR Touring Car Build – Part 3 – Driveline
Tamiya TRF419XR Touring Car Build – Part 4 – Steering
Tamiya TRF419XR Touring Car Build – Part 5 – Suspension
Tamiya TRF419XR Touring Car Build – Part 6 – Anti-Roll Bars
Tamiya TRF419XR Touring Car Build – Part 7 – Shocks
Tamiya TRF419XR Touring Car Build – Part 8 – Final Assembly
 CompetitionX CompetitionX is the most up-to-date source for RC Car News, Reviews and Videos for Radio Control. We also have the most comprehensive Manual Database on the web.

