The final steps in the Tekno ET410 are the wheels and tires, Velcro install and body.
For the wheels and tires, I’m using:
• #8262-03 Pro-Line Racing Positron T 2.2″, MC Compound, www.prolineracing.com
• #7852 Team Associated Truck Hex Wheels, White, www.teamassociated.com
Amazing paintwork by the one and only Sharkbait Designworks! This dood is simply amazing!
Build Notes:
 Tekno has included three wing shims with the ET410; a 0° (flat), 1.5° and 3°. You can place in different configurations to adjust the rear downforce of the ET410.
Tekno has included three wing shims with the ET410; a 0° (flat), 1.5° and 3°. You can place in different configurations to adjust the rear downforce of the ET410.
Step 1:
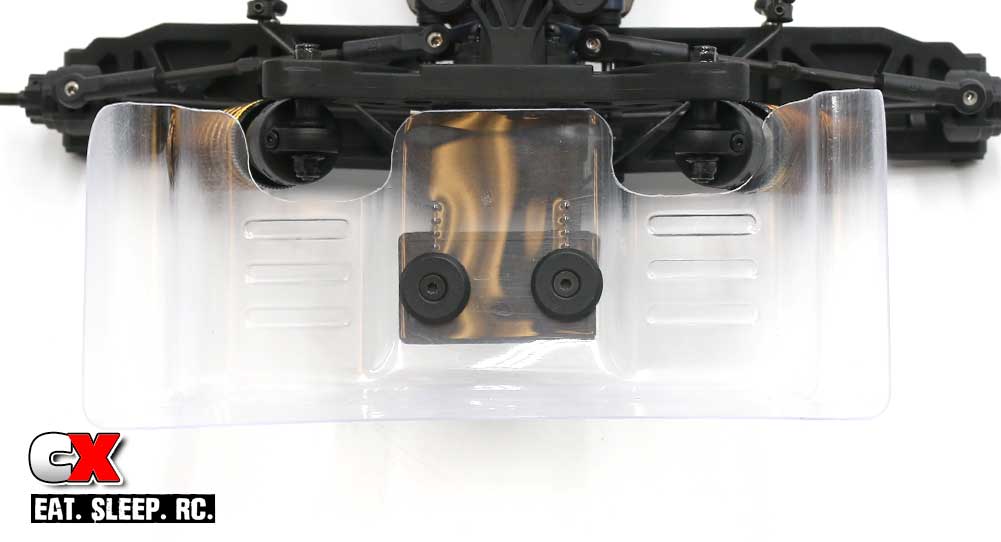
Attach the wing to the rear of the ET410. The kit wing shim calls for the 0°, so that’s what we’ll start with.
Attach the wing to the rear of the ET410. The kit wing shim calls for the 0°, so that’s what we’ll start with.
Step 2:
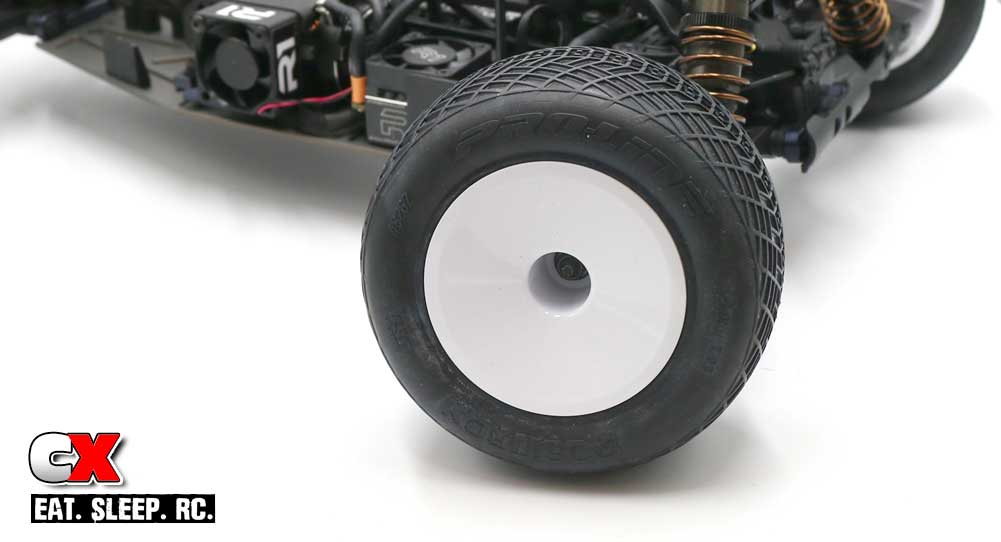
Slip on your wheel and tire combo of choice and secure with the serrated wheel nuts.
Slip on your wheel and tire combo of choice and secure with the serrated wheel nuts.
Step 3:

If you’re using the included Velcro, go ahead and install that now. Use the matching piece on the body. I’ll be using both the Velcro and body clips. I plan on airing this truggy out and want to minimize any air under the body!
If you’re using the included Velcro, go ahead and install that now. Use the matching piece on the body. I’ll be using both the Velcro and body clips. I plan on airing this truggy out and want to minimize any air under the body!
So there ya go – a full, step-by-step build of the ET410. What an amazing vehicle – time to get it out on the track and have some fun!
Thanks for following along!
Use the links below to follow each step.
Tekno ET410 Truggy Build – Opening Page
Tekno ET410 Truggy Build – Part 1 – Differentials
Tekno ET410 Truggy Build – Part 2 – Front Bulkhead
Tekno ET410 Truggy Build – Part 3 – Rear Bulkhead
Tekno ET410 Truggy Build – Part 4 – Rear Suspension
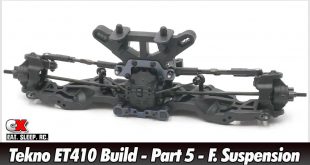
Tekno ET410 Truggy Build – Part 5 – Front Suspension
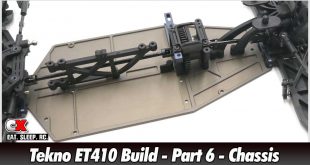
Tekno ET410 Truggy Build – Part 6 – Chassis Assembly
Tekno ET410 Truggy Build – Part 7 – Shocks
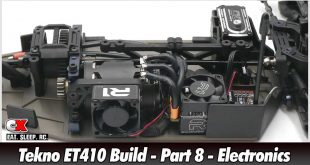
Tekno ET410 Truggy Build – Part 8 – Electronics
Tekno ET410 Truggy Build – Part 9 – Final Assembly
Tekno ET410 Truggy Build – Opening Page
Tekno ET410 Truggy Build – Part 1 – Differentials
Tekno ET410 Truggy Build – Part 2 – Front Bulkhead
Tekno ET410 Truggy Build – Part 3 – Rear Bulkhead
Tekno ET410 Truggy Build – Part 4 – Rear Suspension
Tekno ET410 Truggy Build – Part 5 – Front Suspension
Tekno ET410 Truggy Build – Part 6 – Chassis Assembly
Tekno ET410 Truggy Build – Part 7 – Shocks
Tekno ET410 Truggy Build – Part 8 – Electronics
Tekno ET410 Truggy Build – Part 9 – Final Assembly