The Build – Part 2
The next couple of steps have us prep the chassis on the Team Associated B64 Club Racer.
 Blue threadlocking compound is suggested on quite a few steps from here on out. Have some available to avoid any screws falling out while running your B64 Club Racer.
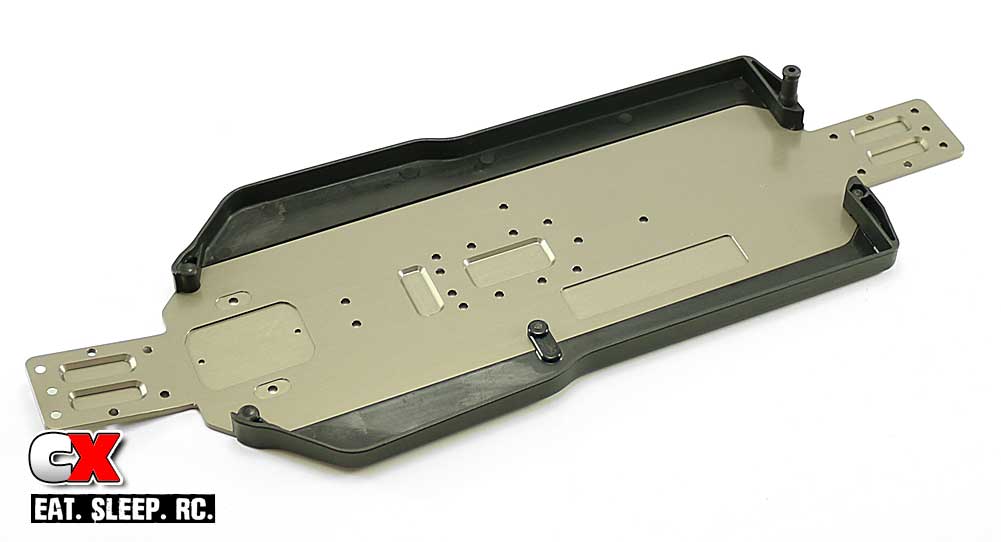
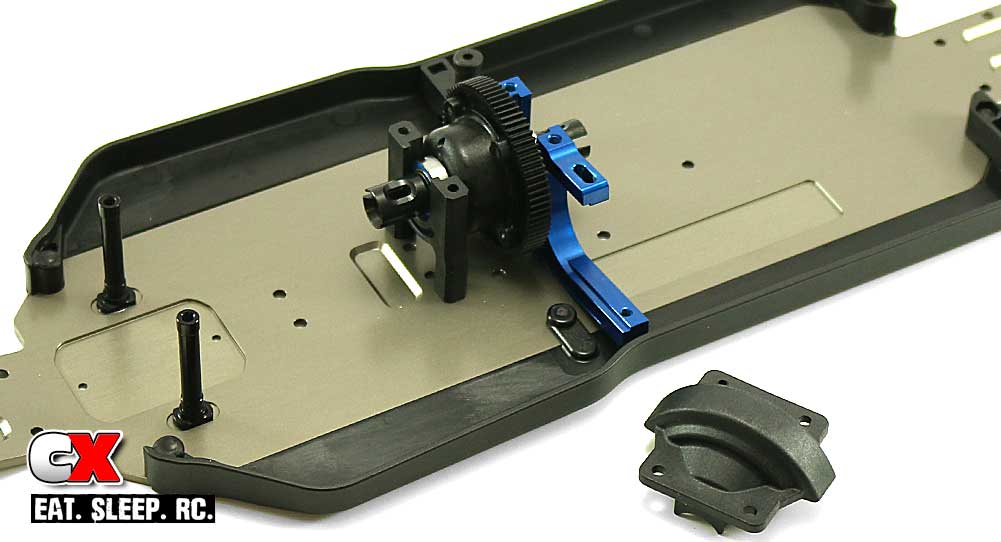
Attach the side rails to the aluminum chassis and add the battery post to the right rear as shown.
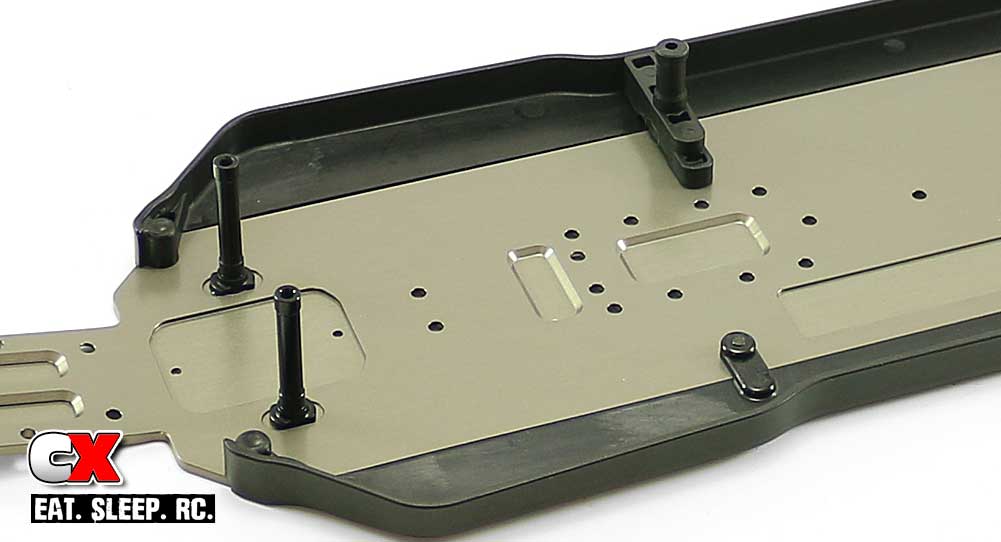
Attach the pair of aluminum servo posts and the battery strap mount. A dab of threadlocker on the screws going into the aluminum posts is recommended.
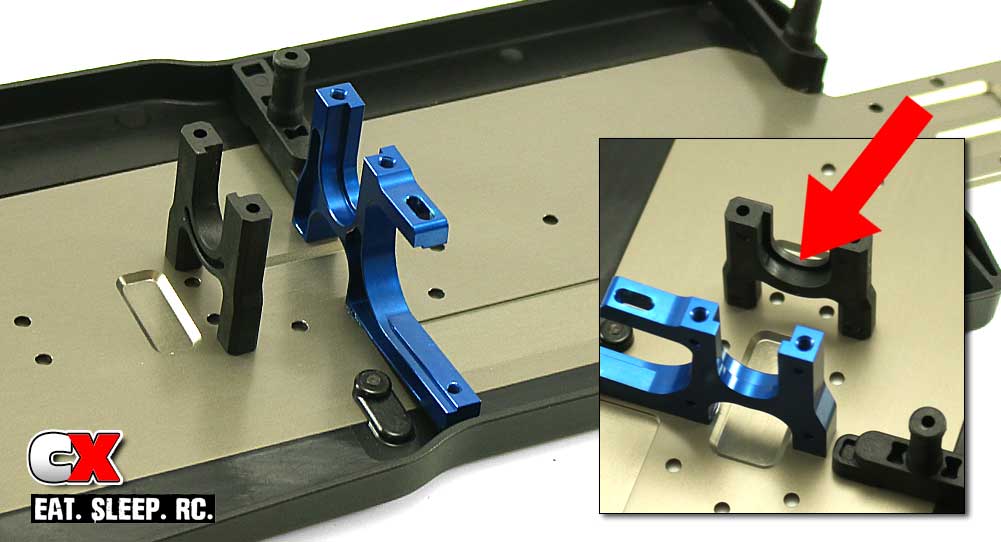
Attach the aluminum and plastic center bulkhead pieces. Blue threadlocker is suggested into the aluminum part.
Note the red arrow; this shows the orientation of the notch on the plastic bulkhead. It should be facing the aluminum mount.
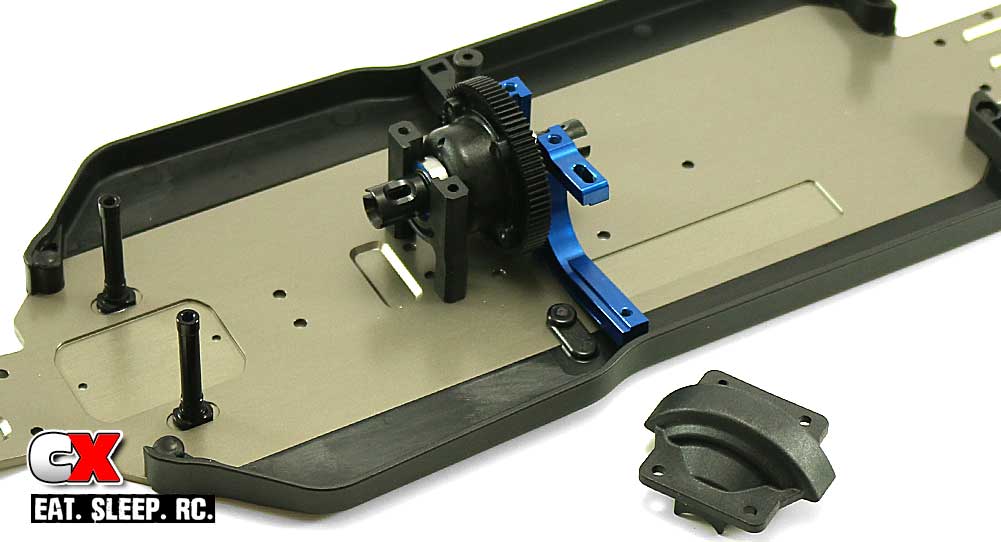
Slide a 10×15 bearing on to each side of the center diff and drop it into place (note its direction). Give it a spin to make sure there is no binding, then attach the center bulkhead cap. Blue threadlocker is suggested here as well.
That was a few easy steps for prep – let’s move on to the steering.
Team Associated B64 Club Racer Build – Opening Page
Team Associated B64 Club Racer Build – Part 1 – Differentials
Team Associated B64 Club Racer Build – Part 2 – Chassis
Team Associated B64 Club Racer Build – Part 3 – Steering
Team Associated B64 Club Racer Build – Part 4 – Front Bulkhead
Team Associated B64 Club Racer Build – Part 5 – Front Suspension
Team Associated B64 Club Racer Build – Part 6 – Servo
Team Associated B64 Club Racer Build – Part 7 – Rear Bulkhead
Team Associated B64 Club Racer Build – Part 8 – Rear Suspension
Team Associated B64 Club Racer Build – Part 9 – Turnbuckles
Team Associated B64 Club Racer Build – Part 10 – Shocks
Team Associated B64 Club Racer Build – Part 11 – Electronics
Team Associated B64 Club Racer Build – Part 12 – Body, Wheels and Tires
 CompetitionX CompetitionX is the most up-to-date source for RC Car News, Reviews and Videos for Radio Control. We also have the most comprehensive Manual Database on the web.
