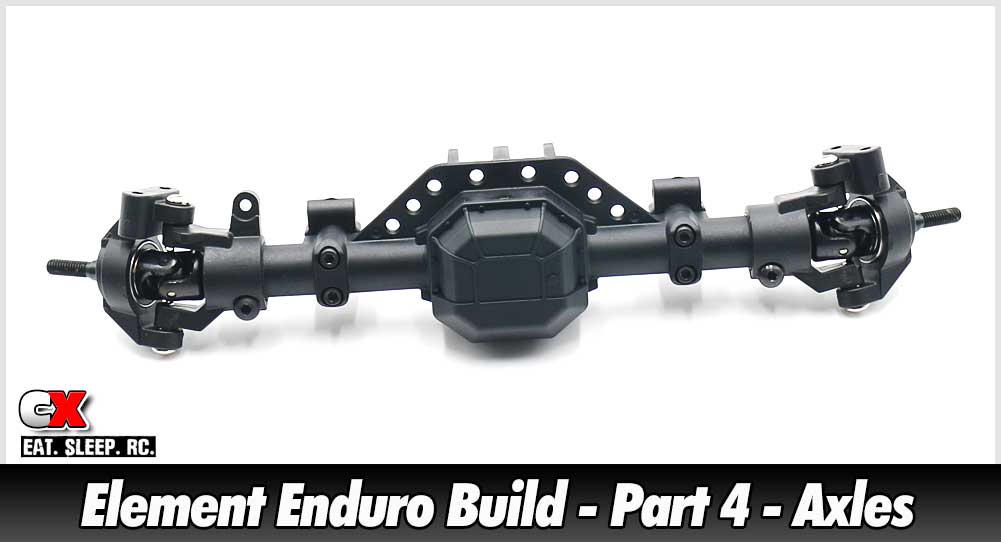
The Enduro uses a nicely molded pair of front and rear axles. Both incorporate steel lockers and oddly small input pinions, both having some major helical cuts to them. You’ll also get a taste of BTA steering, or Behind The Axle. This drastically increases the approach angle of the rig!
 Early on in the build, you’ll encounter two instances of 2.5mm screws, both 14mm and 16mm lengths. Make sure you pay attention to where these go – they look very similar.
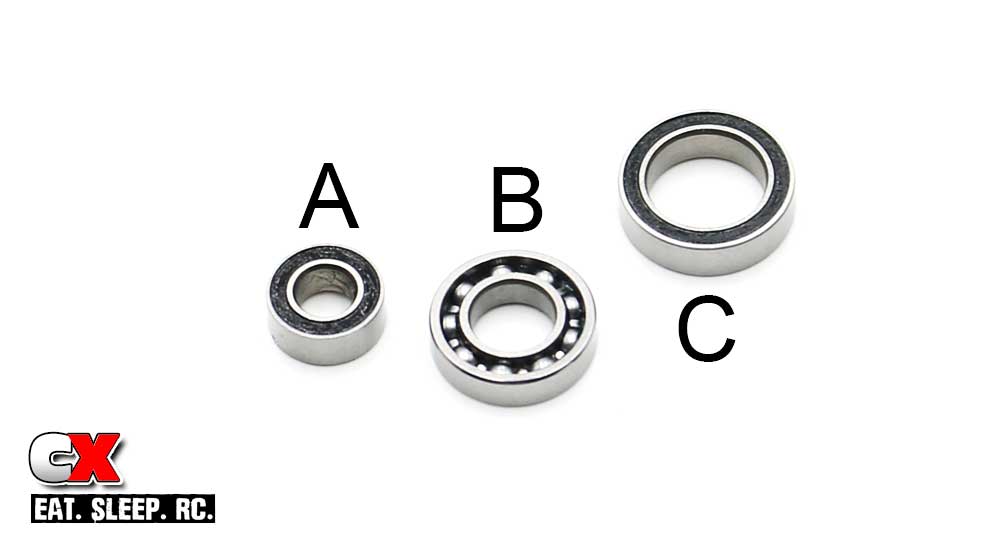
Before we build, I wanted to show you the three different bearings involved in this Step. A is a 5x10mm, uses for the input pinions. B are 7x14mm and come without any dirt shields; used on each side of the lockers. C is a 10×15 and are used in the steering blocks. Just an FYI.
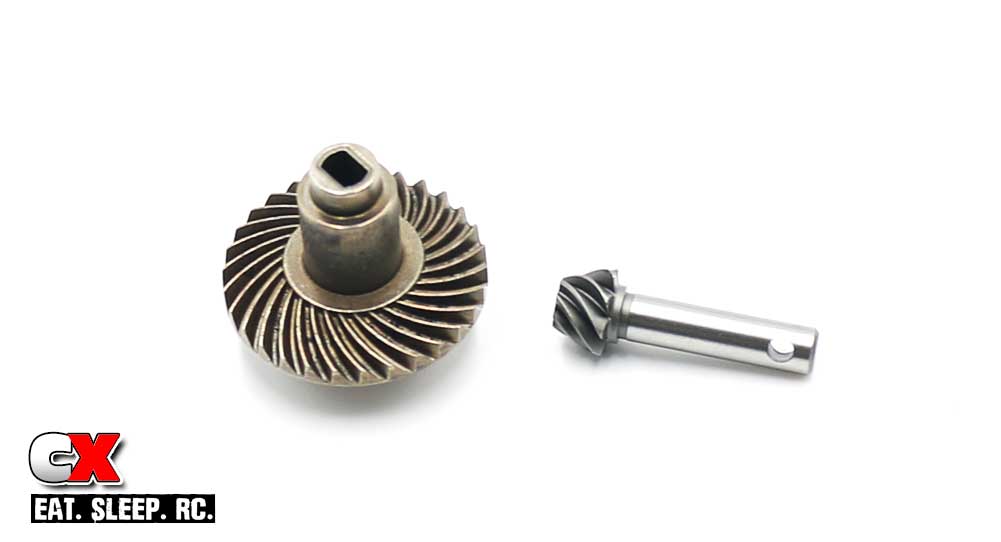
A look at the helical cut locker and pinion. One of the smalled pinions I’ve seen used in a trail rig, but the heavy helical cut should provide a ton of strength.
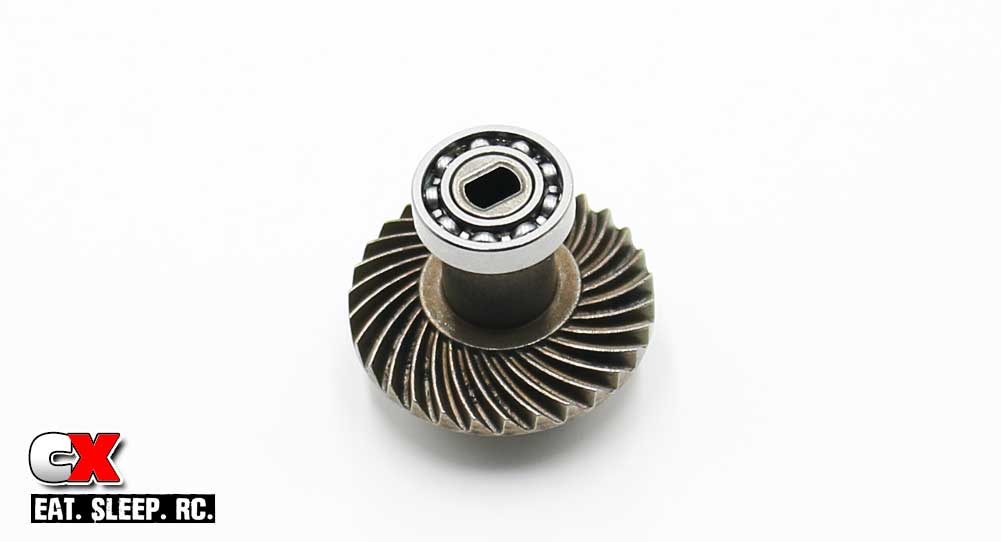
Ok, on to it. Press a 7×14 bearing on to each side of the locker unit.
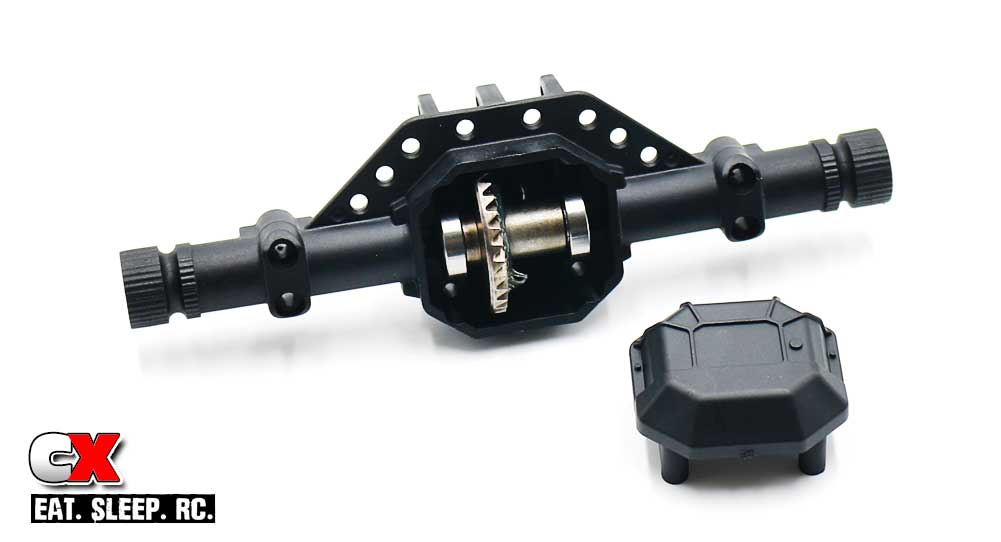
Slide a 5x10mm bearing on the pinion output shaft and press it into the axle case. Set the locker assembly into the axle case. Spread a liberal bead of black grease onto the gears, then press the axle housing cover into place, securing with the 4 2.5x16mm screws. Note the direction of the axle housing cover (see picture).
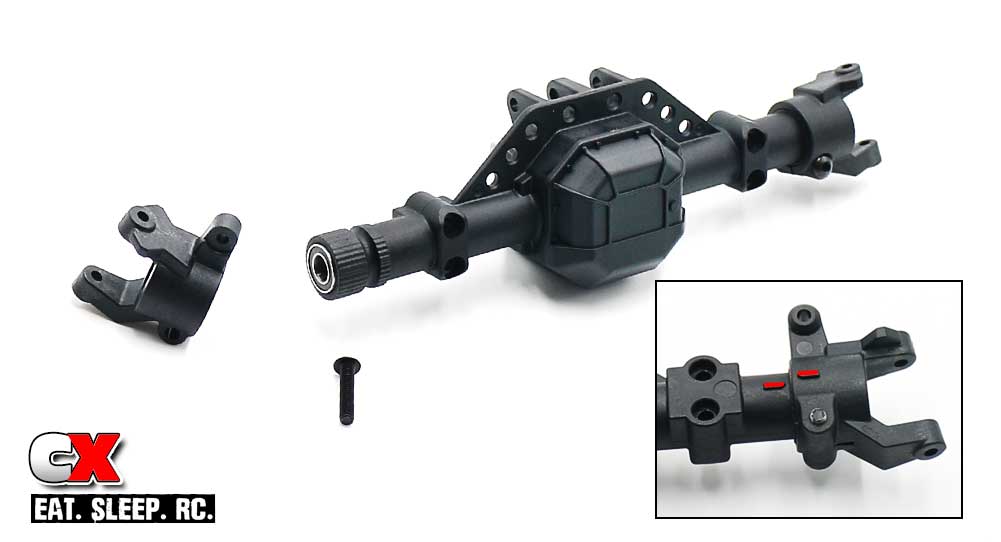
Press a 5x10mm bearing into the end of the axle, then slide the caster blocks onto the axle and secure with the 3x14mm screw. Note the inset; the caster blocks key to the axle (see red marks). This is a good starting caster setting. You can rotate the block to experiment with more or less caster.
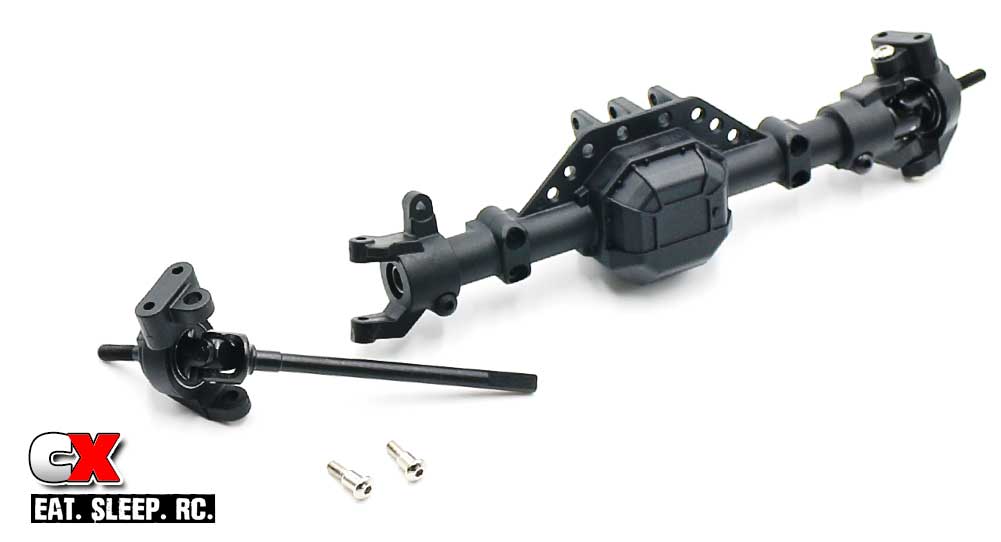
Press a 10x15mm bearing into the backside of the steering block, then slide a front universal assembly into place. Slip the universal into the axle, making sure to key the flat spots with the opening in the locker. Once fully inserted, use the 3x4mm shoulder screws to secure everything in place. Do not overtighten – just snug them down.
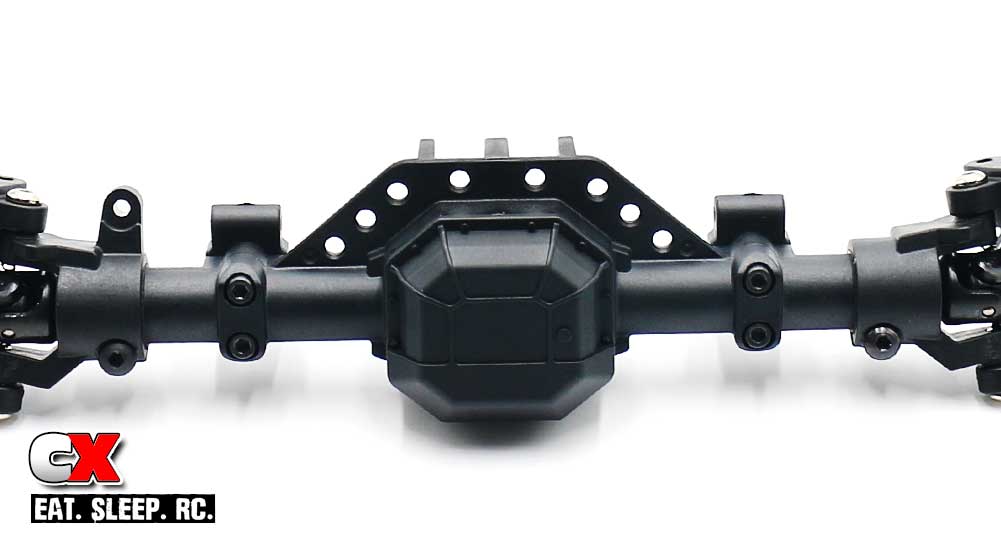
Attach the lower 4-link mounts with the 2.5x14mm screws.
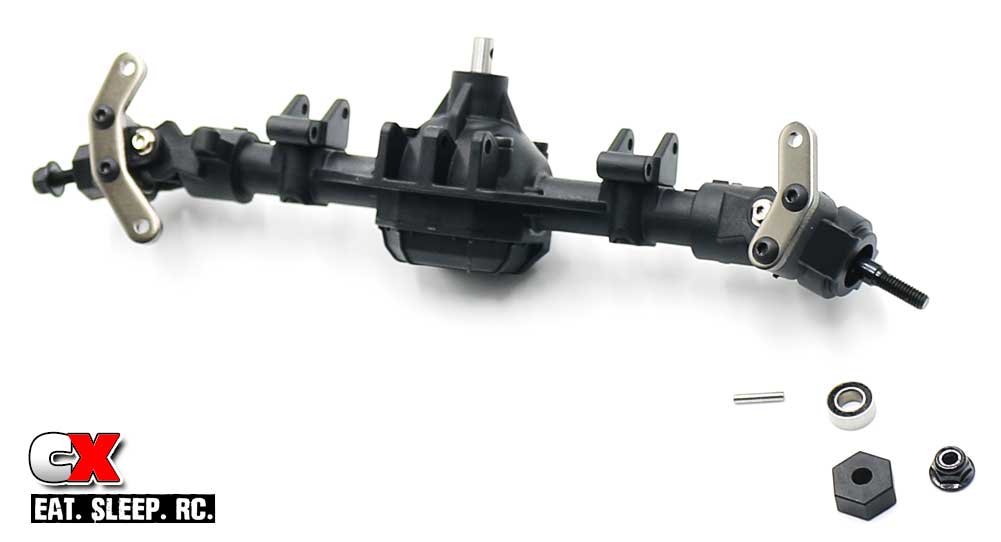
Mount the left and right steering plates as shown.
Install a 5x10mm bearing into the end of the axle housing followed by a wheel pin, wheel hex and wheel nut. Set this assembly aside.
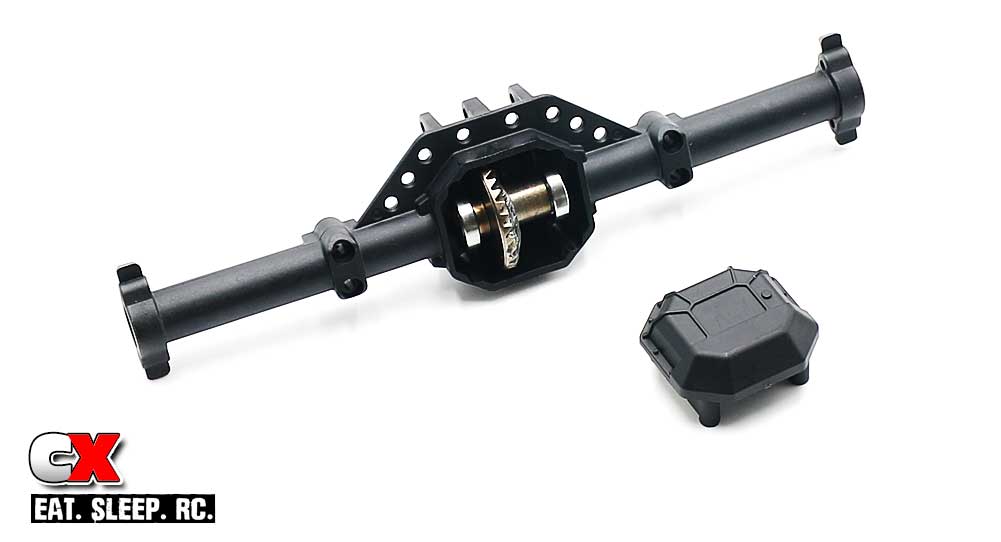
The rear axle is assembled like the front; bearing on the pinion (pressed into the axle), 7x14mm bearings onto the locker, pressed in place, add a little black grease and cap it all off with the axle housing cover. Secure with the 2.5x16mm screws.
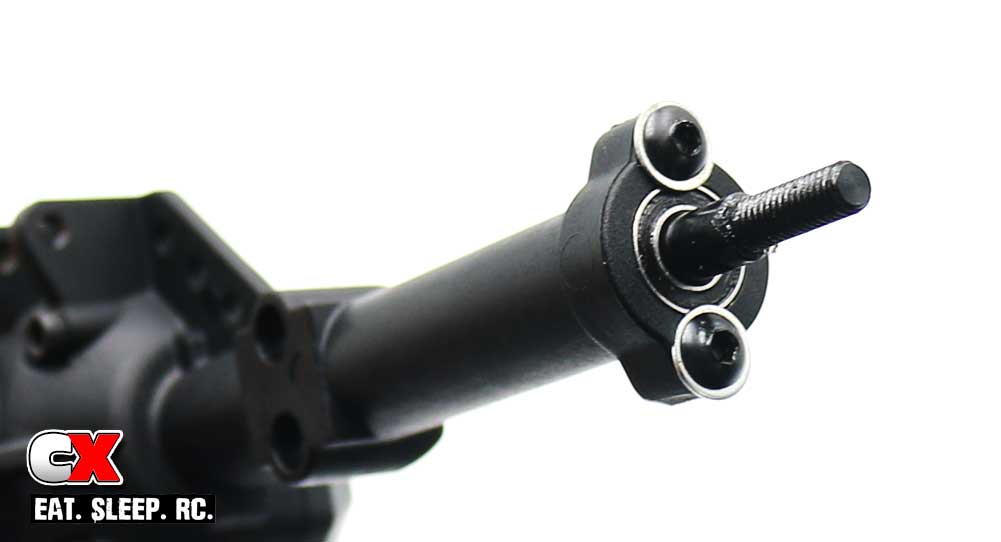
Slide the rear axle into place, keying the flat spots on the end to the slots in the locker. Press a 5×10 bearing into place and secure with the 3x6mm buttonhead screw.
Modification #3 – I wasn’t sold on the itty bitty, teeny tiny amount of screw head keeping the bearings in place, so I added a thin shim behind the screw. I feel better now.
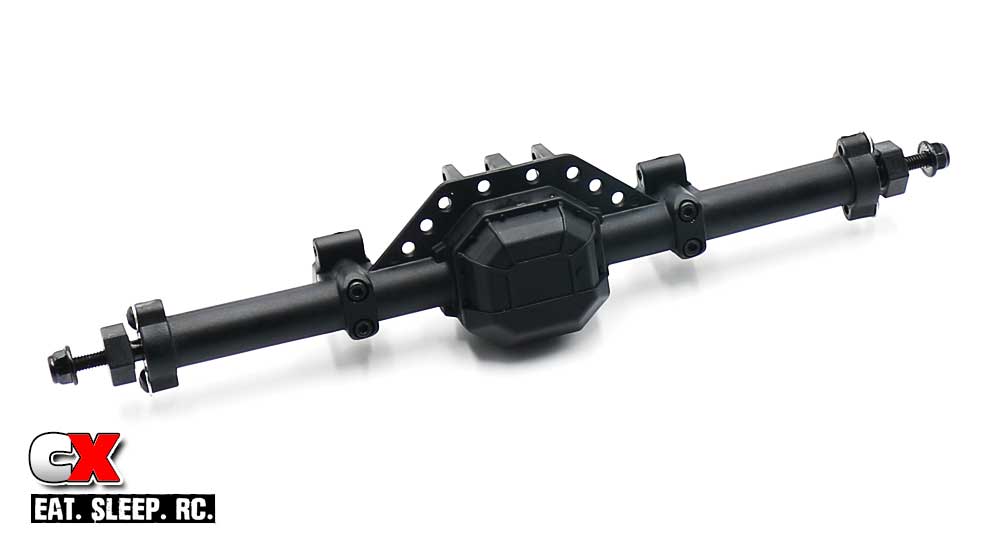
Attach the lower 4-link mounts with the 2.5x14mm screws. Add the wheel pin, wheel hex and wheel nut and your rear axle is complete!
There you have it – a pair of purpose-built axles ready to be mounted under our rig. So, let’s get to that – Part 5 – Links!
Element RC Enduro Trail Truck Build – Opening Page
Element RC Enduro Trail Truck Build – Part 1 – Pre-Build
Element RC Enduro Trail Truck Build – Part 2 – Chassis
Element RC Enduro Trail Truck Build – Part 3 – Transmission
Element RC Enduro Trail Truck Build – Part 4 – Axles
Element RC Enduro Trail Truck Build – Part 5 – Links
Element RC Enduro Trail Truck Build – Part 6 – Drive Shafts
Element RC Enduro Trail Truck Build – Part 7 – Shocks
Element RC Enduro Trail Truck Build – Part 8 – Body Mounts
 CompetitionX CompetitionX is the most up-to-date source for RC Car News, Reviews and Videos for Radio Control. We also have the most comprehensive Manual Database on the web.
Tony, I purchased a used RTR Enduro Sendero. The front pinion axle pinion has longitudinal play (slides in line with the driveshaft). As near as I can tell, it’s assembled properly. Did you find this on your axles? Does your experience find that this is intentional? Some kind of front axle “slipper” to prevent breakage? Or is there possibly something wrong here? The only guess I have is that the inside bearing wasn’t installed.
In my experience, that kind of play is something that happens as a tolerance issue. Typically it’s ok if it’s not to much – it’s there to allow a little float in the drive system. Too much, though, could cause the driveline to be too tight, then too loose, etc, wearing it out pretty quick. My suggestion, if you have the ability, is to shim it to as little play as possible. However, at the same time, you want to make sure the gear mesh IN the axle is not tight – a little gear float is optimium.