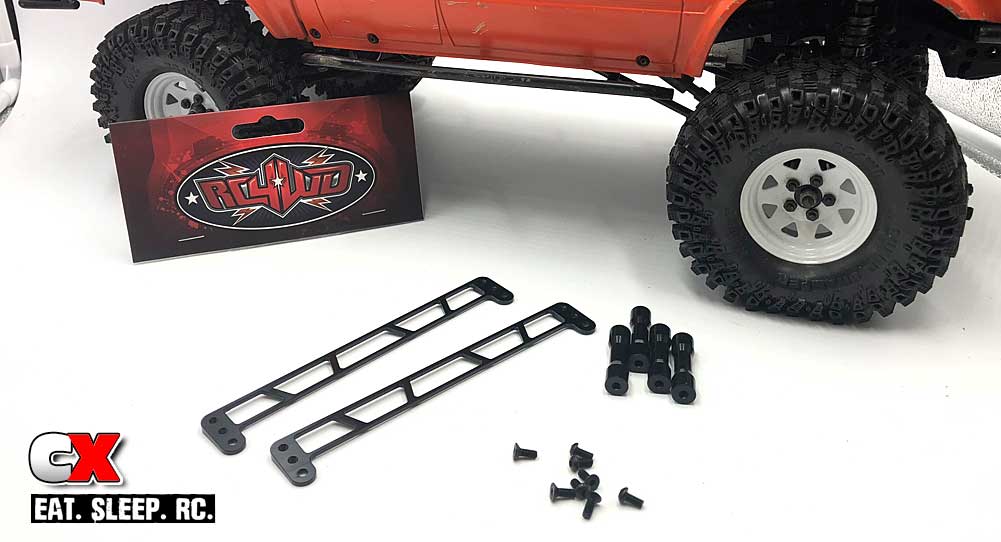
How To: Install a Lift Kit on the RC4WD Trail Finder 2 LWB
The RC4WD Trail Finder 2 (TF2) LWB (Long WheelBase) is a fantastic truck right out of the box. Even with its leaf spring setup, it’s quite capable of traversing some of the most difficult terrain. There is an added challenge to leaf springs and more people are starting to embrace this setup.
My particular TF2 LWB, however, was converted to a full link system last year just before the 2017 East Coast Scale Challenge event. Why did I do this? Well, I’m a link guy and was a little bashful to bring out a leaf sprung truck – something I now regret. While my updated TF2 crawled up everything, I did miss out on that added ‘fun’ of experimenting with springs.
I also, recently, added a much larger tire setup to it and, low and behold, I now have clearance issues. That’s where this article comes in – Installing a RC4WD Lift Kit on the Trail Finder 2 LWB! Easy process – let’s get started.
Items Needed For Install
• 1.5mm Driver
• 2.0mm Driver
• Blue threadlocker
• 1/2″ (or similar) Grub screws (optional)
• Locknuts for the grub screws (optional)
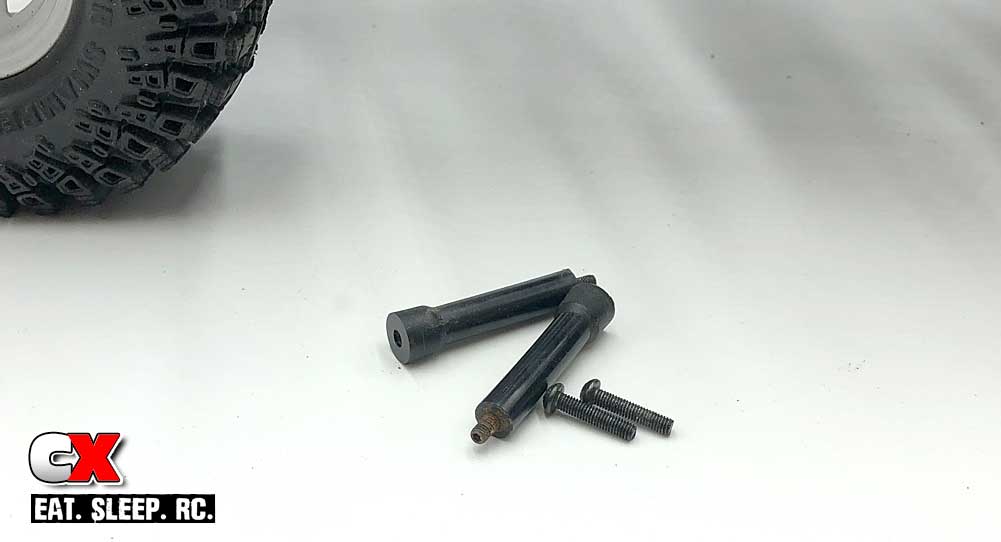
Step 1 is to remove the rear body mounts. Easy to get to – you might need a pair of pliers to grab the plastic mounts.
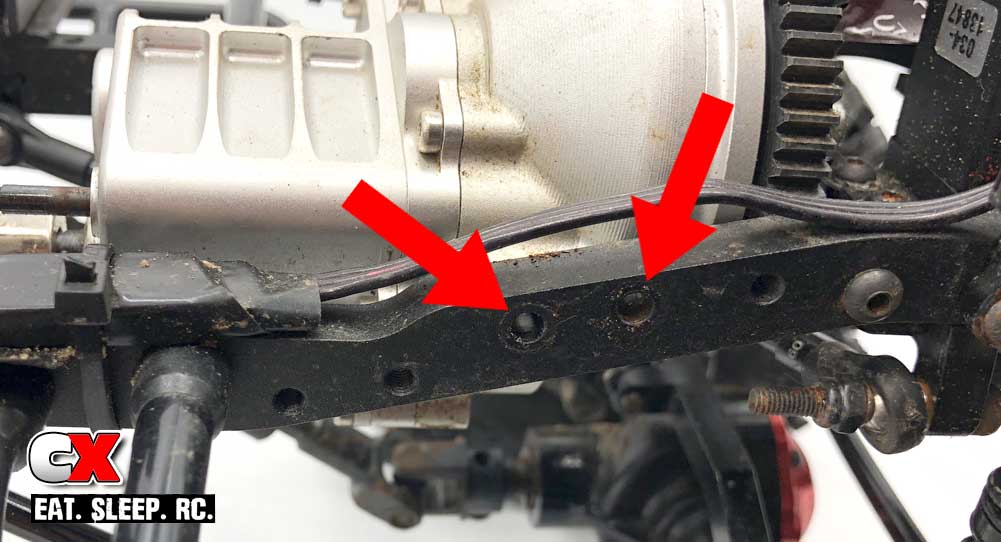
Next, remove the front body mounts. You’ll have a very difficult time getting to these, so we’ll need to swing the motor and transmission out of the way. Remove the two screws holding the transmission in place (see red arrows). Do this on both sides (4 screws in all).
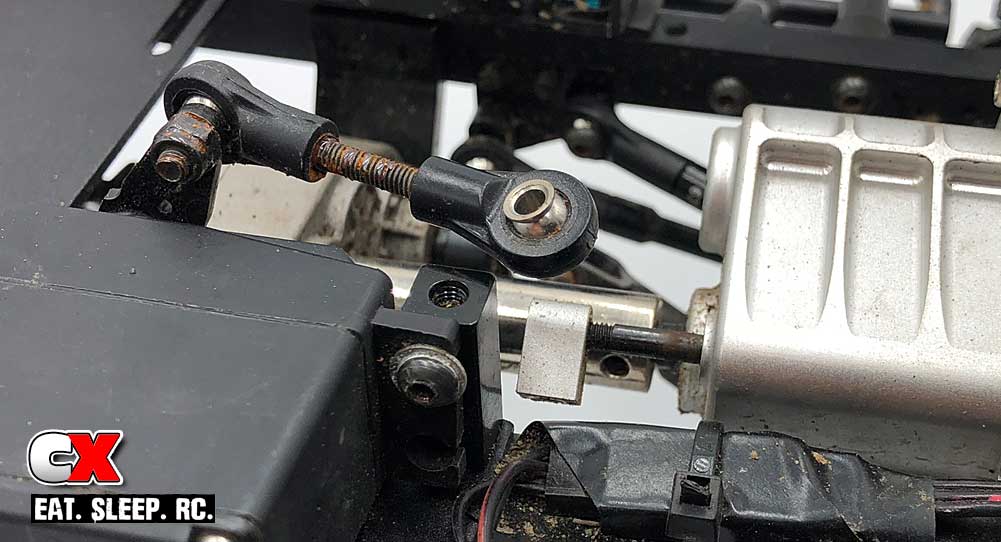
Remove the screw attaching the link to the two-speed as well as the small grub screw connecting the transmission to the silver driveshaft. Remove the grub screw closest to the transmission.
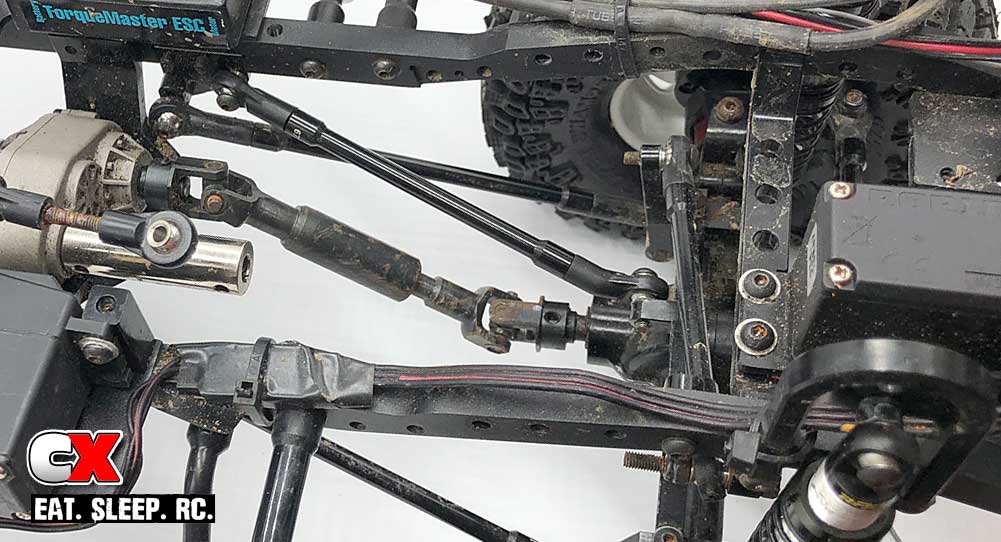
You’ll need to wiggle the transmission a bit, but it should slide right out and fold over to the front of the truck – no need to un-solder the motor wires. Now you have easy access to the front body mounts.
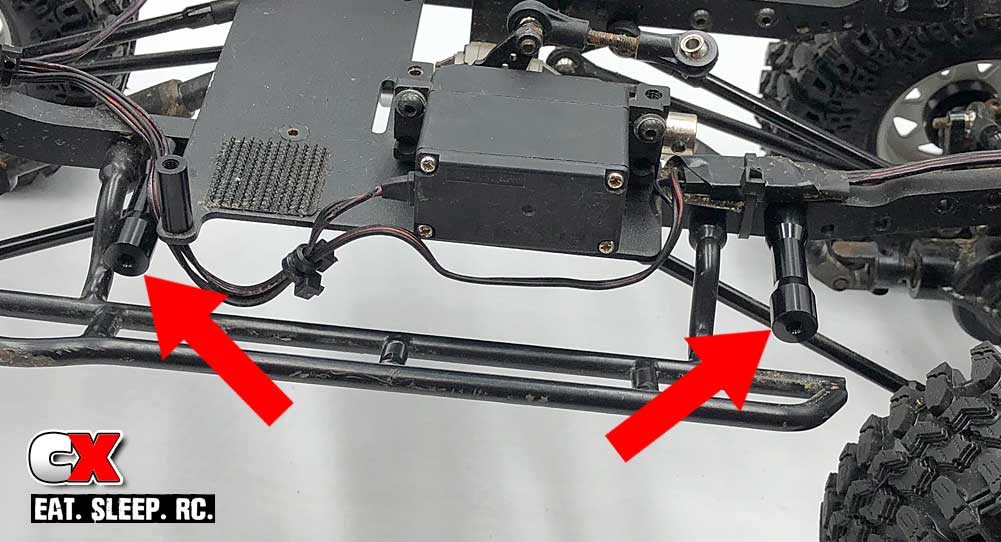
Once the stock plastic body mounts are out of the way, attach the new aluminum ones. Add a drop of blue threadlocker to the screws to make sure they stay in place (see red arrows).
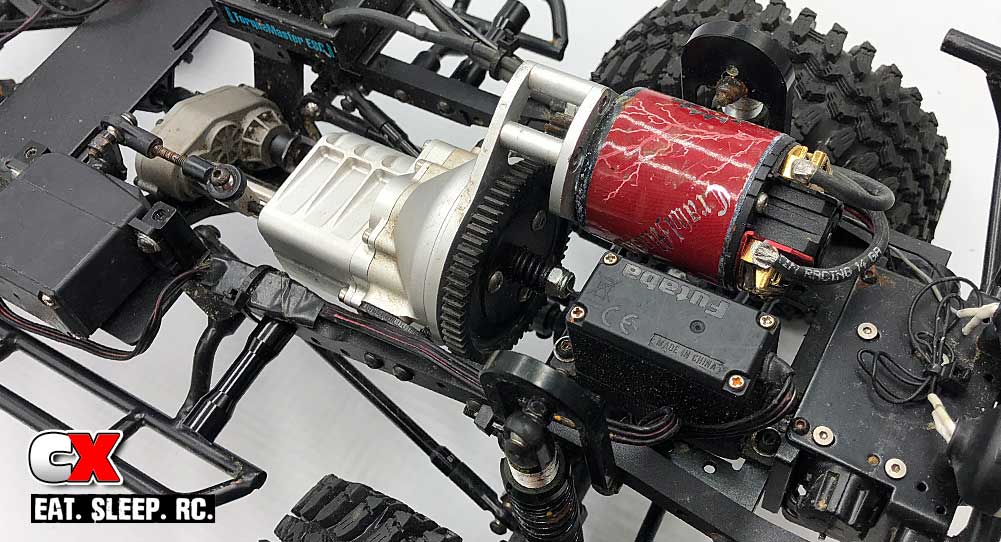
Flip the transmission back over and reverse the disassembly process. Make sure you use blue threadlocker on all the screws.
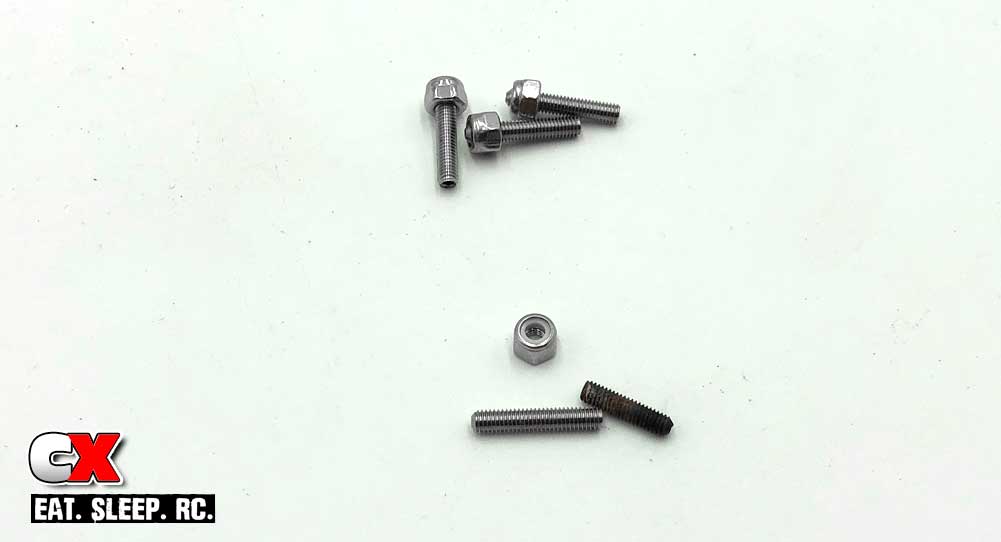
This next step is optional, but it’s a great tip for easy installation and removal the body. I don’t use screws to secure the body; instead, I have long grub screws that ‘slip’ into the holes in the body. It takes some flexing to get the body on and off, but this makes it super secure when driving.
Make 4 assemblies as shown; the silver grub screws are the new ones, the black is the old one. Note the new ones are slightly longer.
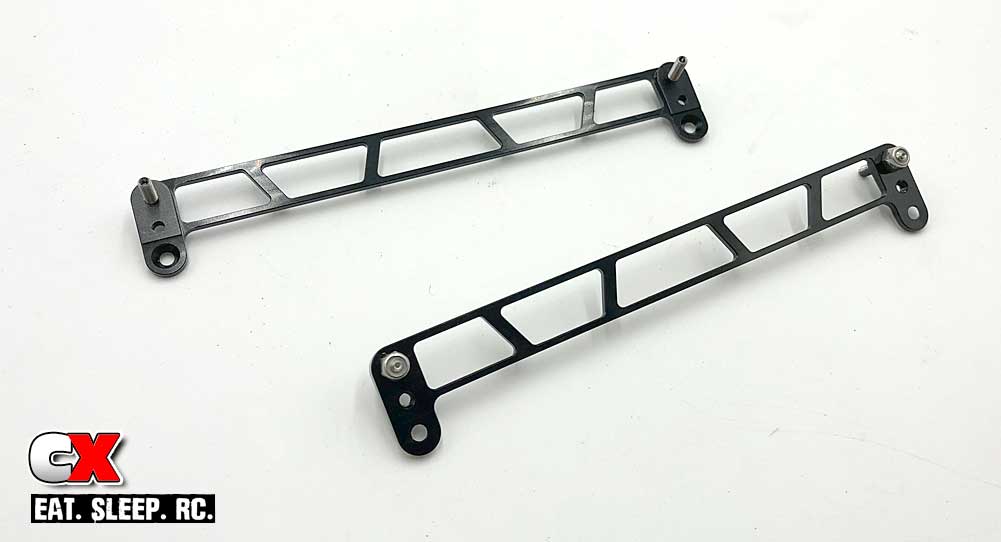
Feed the grub screw assembly into the body lift holes as shown. I would suggest a drop of blue threadlocker on these grub screws. Note the orientation of the countersunk holes.
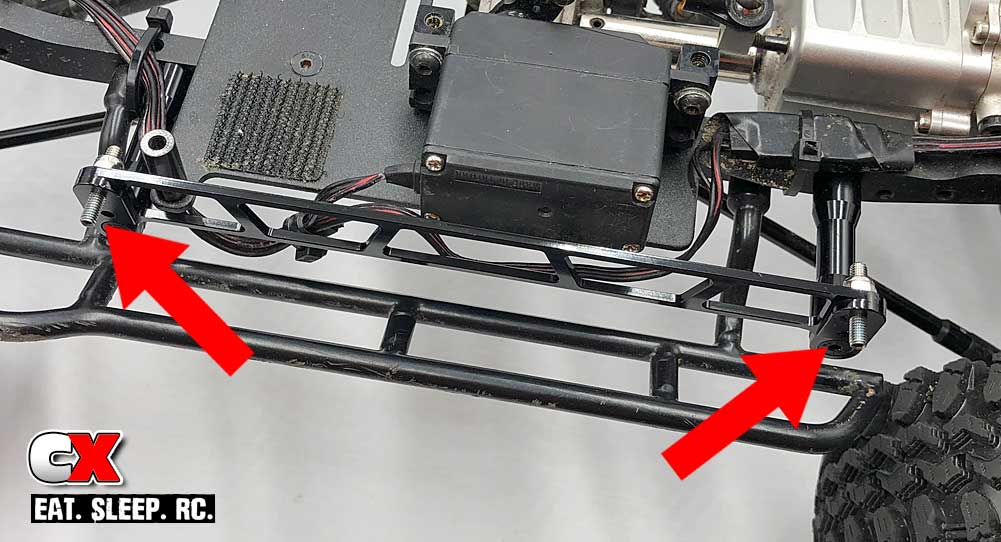
Attach the body lift bars onto the body mounts. Blue threadlocker is suggested.
At this point you can test fit the body. You can adjust the depth of the silver grub screws to the point that they fit through the body holes but not to the point to where it’s impossible to flex the body to get it off. You’ll get the picture once you give it a try.
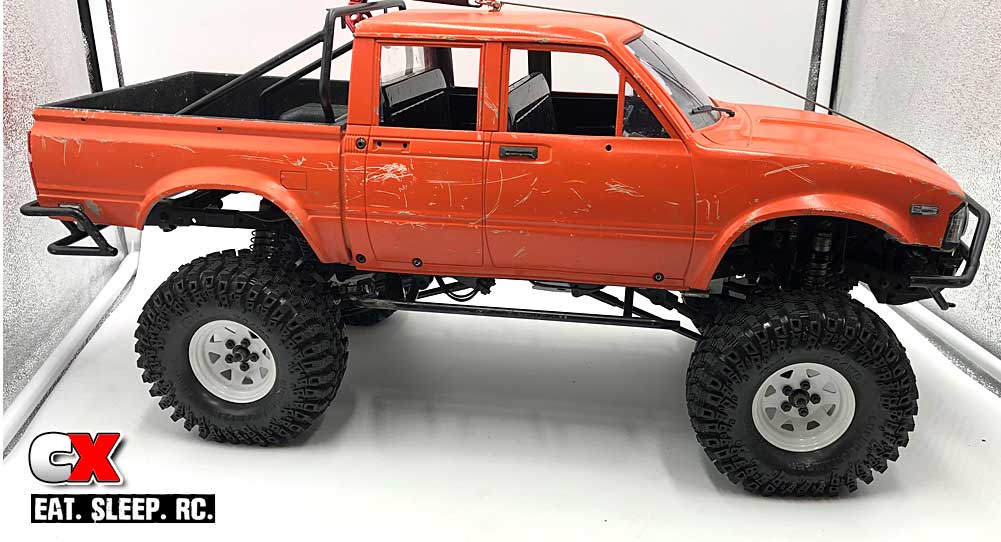
The final product; a TF2 with a healthy lift kit.
RC4WD has included two lift options; a low and a high. I installed it with the high one but might drop it down. I only needed a little more clearance – this looks a bit high.
The process is simple and easy – just don’t forget to use blue threadlocker! You don’t want to be losing any screws while out on the trail!
Parts UsedAX31428 RC4WD Trail Finder 2 Truck Kit “LWB” with Mojave II Four Door Body Set
AX31434 RC4WD Mojave Body Lift Kit for the Trail Finder 2 LWB
Links
RC4WD, www.rc4wd.com
Read our review of the RC4WD Trail Finder 2 LWB – drive video included!
RC Car Review: RC4WD Trail Finder 2 LWB Trail Truck
 CompetitionX CompetitionX is the most up-to-date source for RC Car News, Reviews and Videos for Radio Control. We also have the most comprehensive Manual Database on the web.


Great write up, Tony!
Carry on the good fight friend!!