Beginner’s Guide to RC – Reducing Weight on your Team Associated B5M for Stock or Spec Class Racing
Picture this; you’re at the track, ready for a fun night of stock racing. Your 2WD buggy is prepped and you’re feeling confident about it’s handling and power. You head up for your first qualifying round and, while putting in some stellar laps, you hear the announcer calling off some of your faster lap times. But that’s not all you hear; you notice he is also calling out some of your opponents lap times – and they’re 1/2 a second a lap faster! How can that be? You know your car is on point and this is SUPPOSED to be all-things-equal stock-class racing … what’s going on?
This isn’t the first time I’ve heard this scenario – it’s even happened to me a couple times. I decided to take a closer look at what might be one of the deciding factors to my opponents faster lap times. Assuming all things are relatively equal (motors, batteries, driving ability, etc), one thing that caught my eye was my opponents use of quite a few lightweight components on his car. These lightweight parts chopped quite a bit of poundage off his buggy, resulting in a lighter car that accelerated faster, was more nimble and could jump farther with a lot less effort.
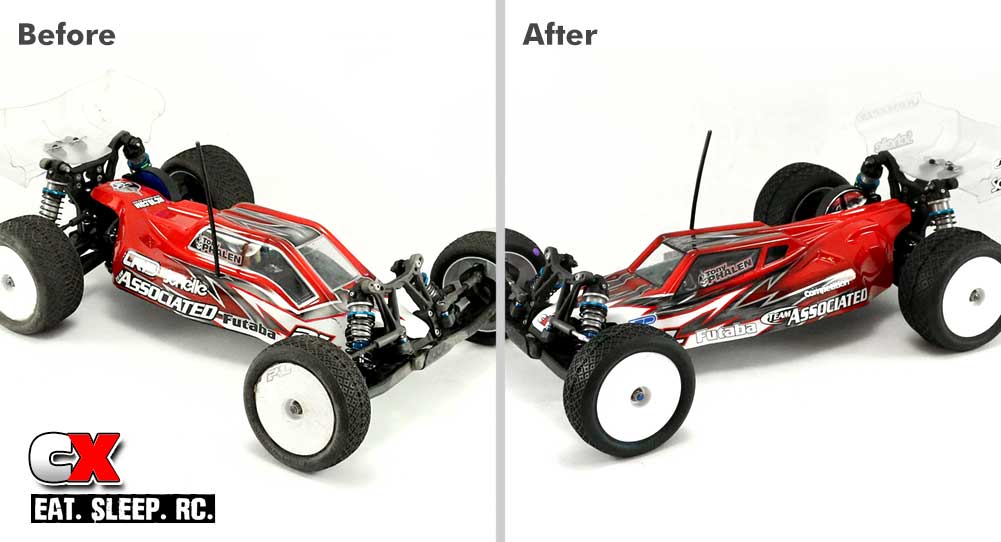
Yah, I’m pretty competitive so that’s just not going to work for me. I have a first-gen Team Associated B5M; it handles great and ‘seems’ fast but it is a bit bloated compared to some other buggies on the track, so I decided it was time to put it on a severe diet.
I’ve created a quick guide to some optional parts that will help turn your rotund ride into a tissue-like two-wheeler.
Titanium Screw Set
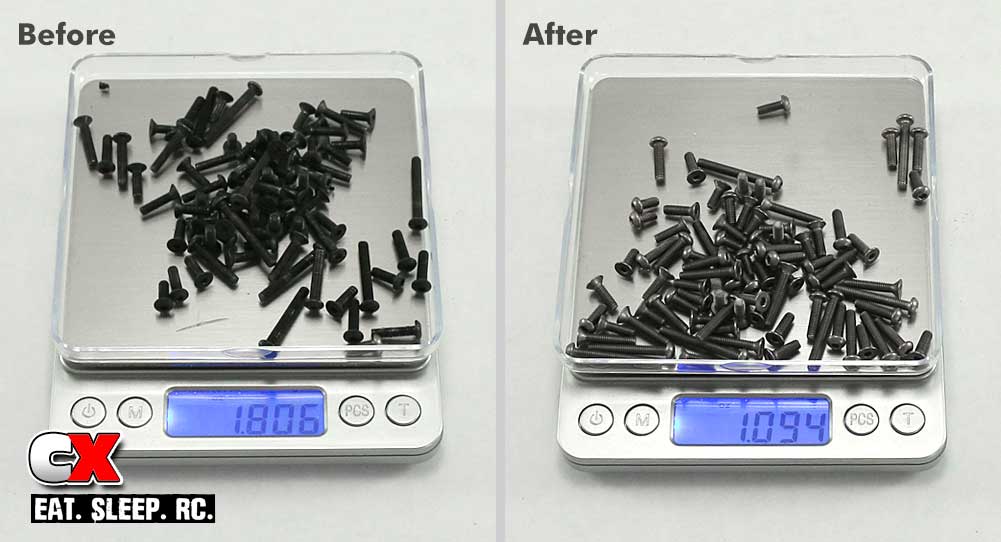
One sure fire way to shed a little weight is to replace all of the standard black screws with a set of titanium. Singly, there’s not much of a difference, but when you swap all of them out, we’re looking at a 20g savings.
Team Associated Titanium Screw Set
Original Part: 1.806oz (51.19g)
Upgrade Part: 1.094oz (31.01g)
Weight Savings: .712oz (20.18g)
91600 Team Associated B5M Titanium Screw Set
Factory Lite B5M Chassis
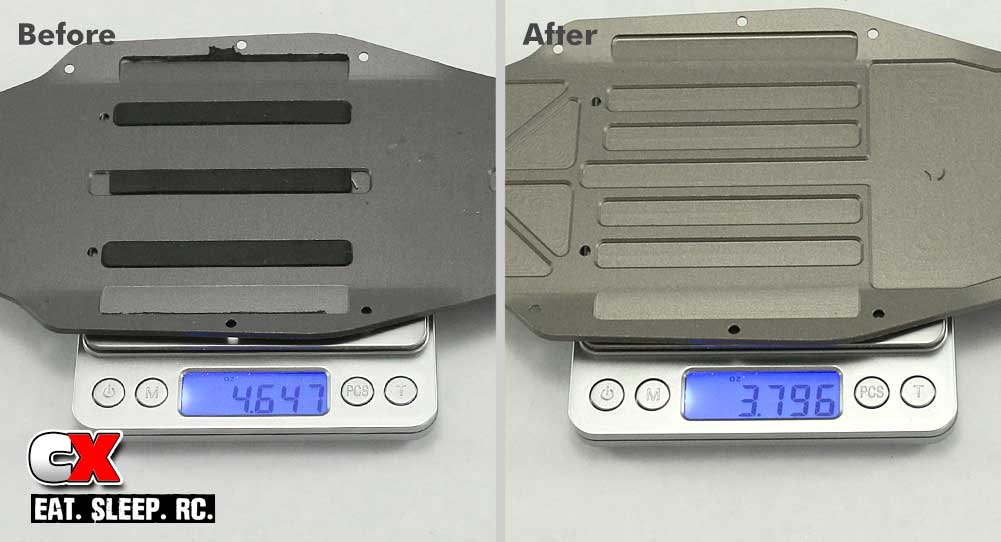
Another part of the B5M that is pretty porky is the stock aluminum chassis. It’s the second heaviest part on the car and if we can lose a little weight here, that would help out alot. Thankfully AE released a B5M Factory Lite Edition, meaning there was a lightweight chassis option already available. It’s the same design as the stock chassis, but has a few more pockets milled into the upper surface to help reduce weight – 24g of weight. Easy bolt on and a direct fit.
Team Associated Factory Lite B5M Chassis
Original Part: 4.647oz (131.74g)
Upgrade Part: 3.796oz (107.61g)
Weight Savings: .851oz (24.12g)
91511 Team Associated B5M Factory Lite Chassis
Carbon Fiber Battery Strap
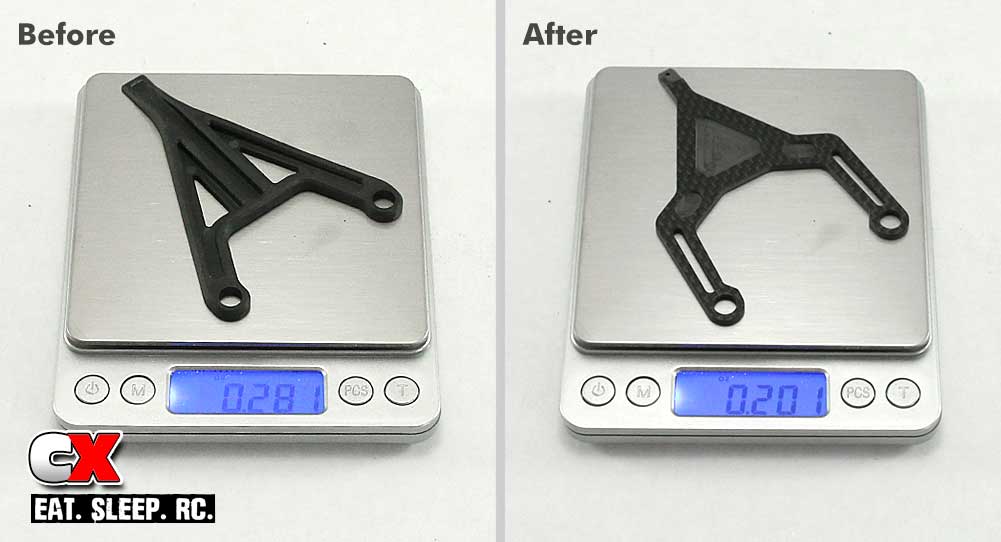
The stock battery strap is molded from plastic and is already pretty light, but there is another alternative – a carbon fiber battery strap from Schelle Racing. This strap only saves about 2g of weight but remember, it all adds up in the end. Plus, it is carbon fiber, so it adds some cool points as well.
Schelle Racing Carbon Fiber Battery Strap
Original Part: .281oz (7.96g)
Upgrade Part: .201oz (5.69g)
Weight Savings: .080oz (2.26g)
SCH1088 Schelle Racing Carbon Fiber Battery Strap – Team Associated B5M
Titanium Turnbuckles
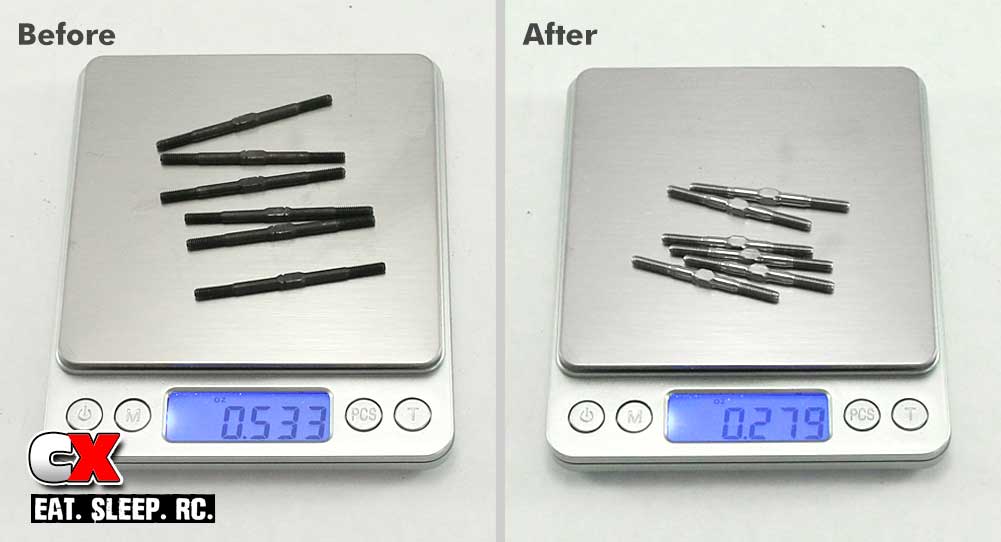
The original B5M came with steel turnbuckles; it wasn’t until the Factory Lite car came out that you could get AE’s titanium equivalents. I’ve used Lunsford products forever and immediately knew they needed a place in this build. Installing these cut the weight of the turnbuckles in half, saving a little over 7g. Oh, and they’re shiny. That looks way better than the black steel links.
Lunsford Punisher Series Titanium Turnbuckles
Original Part: .533oz (15.11g)
Upgrade Part: .279oz (7.90g)
Weight Savings: .254oz (7.20g)
2006 Lunsford Punisher Series Titanium Turnbuckles – Team Associated B5
Aluminum Front Axles
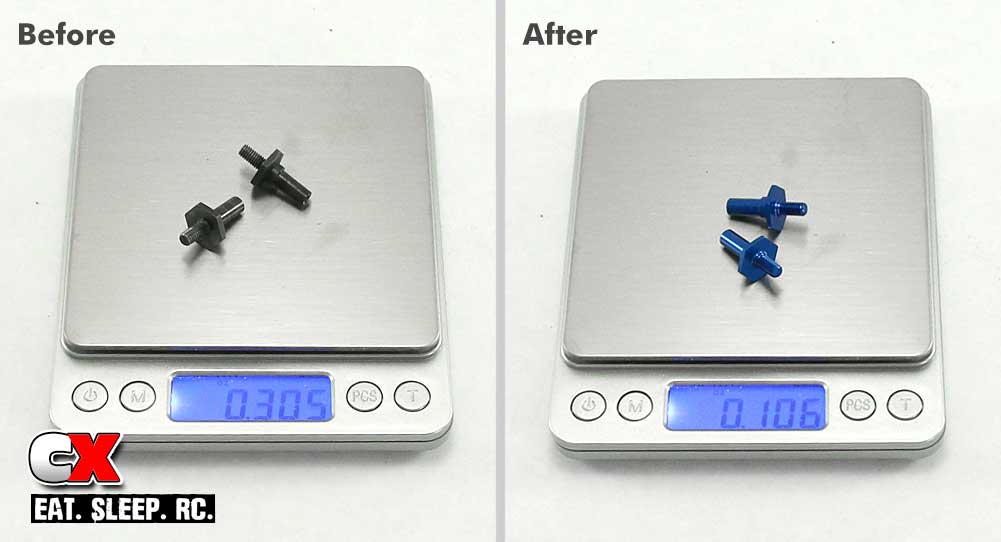
Removing rotating weight is a fantastic way to gain acceleration and speed, so I swapped out the stock steel front axles with Team Associated’s aluminum front axles. Overall, these saved a ton of weight, a little over 5.5g! They’re also anodized up in Factory Team blue, so they look awesome … well, as long as you have the front tires off.
Team Associated Aluminum Front Axles
Original Part: .305oz (8.64g)
Upgrade Part: .106oz (3.00g)
Weight Savings: .199oz (5.64g)
91411 Team Associated Aluminum Front Axles
Optimized ESC
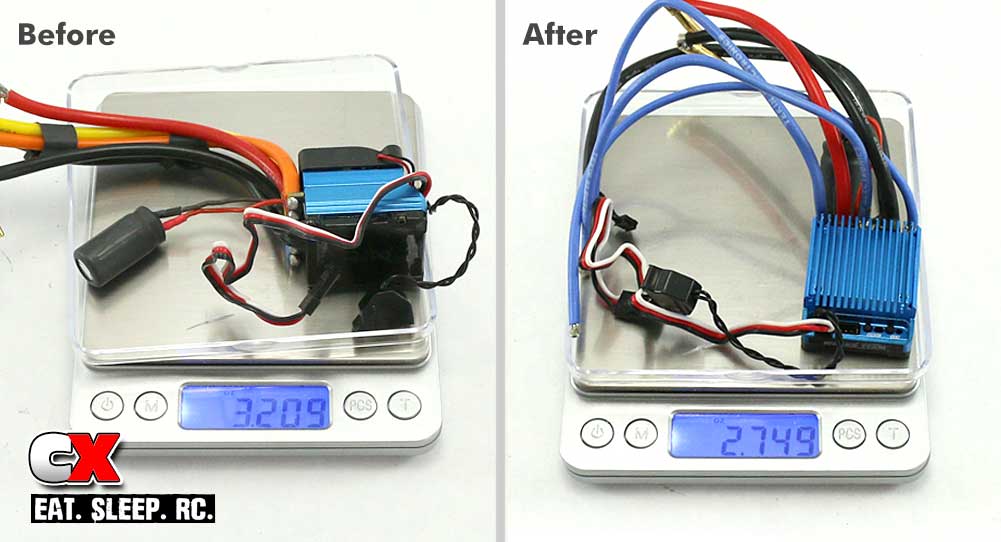
From the beginning, I’ve had LRP’s Flow WorksTeam ESC in my B5M. When it came to weight reduction, I could have gone a couple different ways with this, including dropping in a plastic-cased Reedy Blackbox 800z. I found that, after doing some weight reduction, the LRP was actually lighter. I started by removing the cooling fan, swapping out the motor wires to a smaller gauge and installing a lighter sensor wire. I figured it is stock racing so the ESC wasn’t going to be hitting any abnormal temps. The weight savings was pretty good as well; a little over 13g.
LRP Flow WorksTeam Brushless ESC
Original Part: 3.209oz (90.97g)
Upgrade Part: 2.749oz (77.93g)
Weight Savings: .460oz (13.04g)
80970 LRP Flow WorksTeam Brushless ESC
Transmission
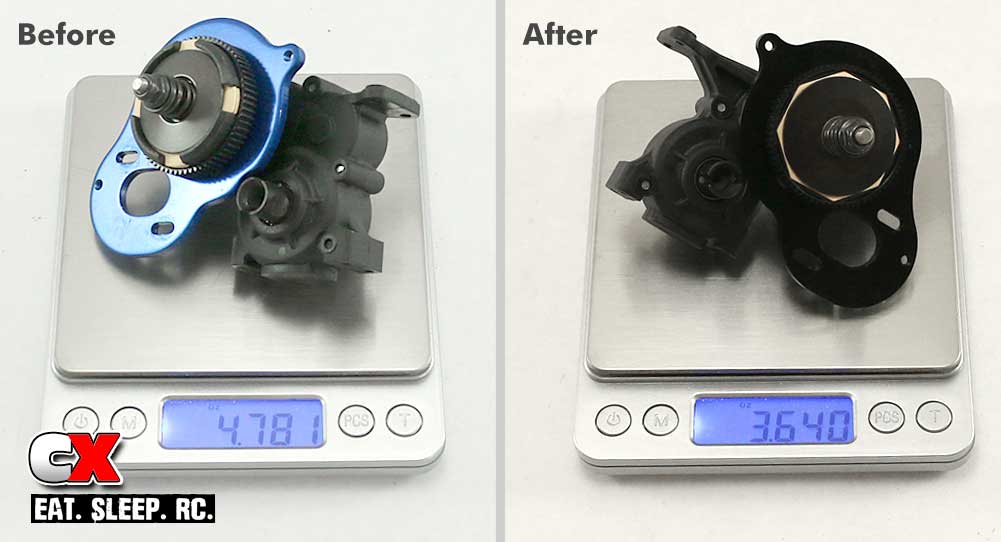
One of the best upgrades to the original B5M is to install a complete 3-gear transmission. This does a number of things; it reduces the amount of rotating transmission parts, it lowers the CG of the buggy and also removes quite a bit of weight. There are only a few parts you really need to do this conversion; the 3-gear transmission case, the aluminum V2 topshaft, a 3-gear gear cover and a pair of 5x10x4mm bearings.
I also had the V2 Slipper Clutch system installed but opted to replace that with AE’s standard slipper system, shedding even more rotating mass. If you’ve got some expert driving skills, you can replace the entire slipper system with a ‘direct drive’ setup for even more weight savings. I wasn’t sure if I wanted to go quite that far, but after driving the updated buggy, I may just give it a try.
Team Associated 3-Gear Transmission
Original Part: 4.781oz (135.53g)
Upgrade Part: 3.640oz (103.19g)
Weight Savings: 1.141oz (32.34g)
7485 Team Associated V2 Slipper Hub
9603 Team Associated Slipper Pads
91560 Team Associated 5x10x4mm Bearings
91602 Team Associated 3-Gear Motor Plate
91604 Team Associated B5M 3-Gear Gear Cover
91606 Team Associated V2 Aluminum Top Shaft
91607 Team Associated B5M 3-Gear Gearbox
Lightweight Body
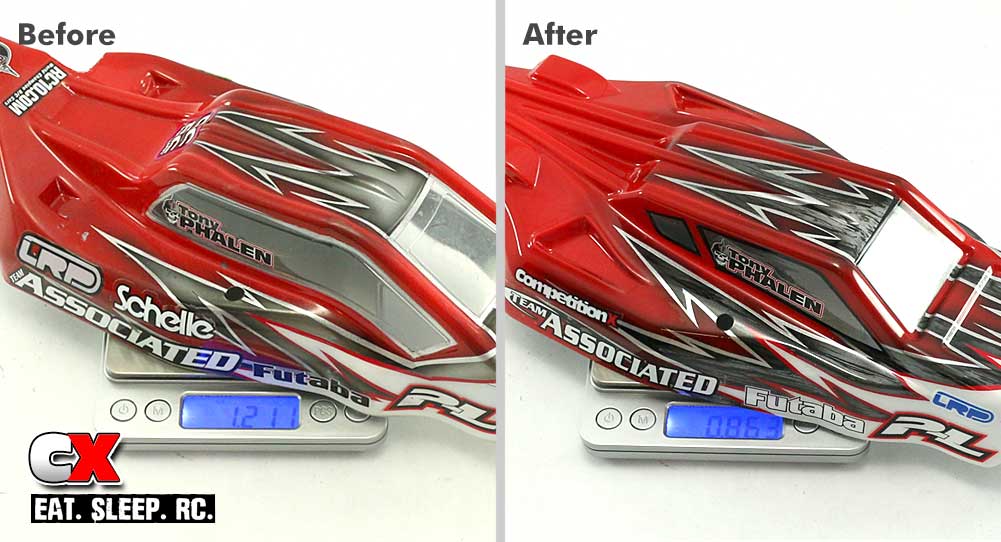
The stock body looks great and is actually very light, so I didn’t think there would be much to do in this department save for drilling alot of holes. Then I saw that JConcepts has a body perfect for stock racing. It’s pulled from a lighter weight Lexan and has been designed with a lower profile. Once painted and stickered, I was able to shave off almost 10g! That’s a pretty big savings for something so high up on the chassis! Thanks to Larry Genova of Kustom RC Graphics for the dialed paint on both bodies!
JConcepts S2 B5M Lightweight Body
Original Part: 1.211oz (34.33g)
Upgrade Part: .863oz (24.46g)
Weight Savings: .348oz (9.86g)
0293L JConcepts S2 B5M Lightweight Body
Body Mount
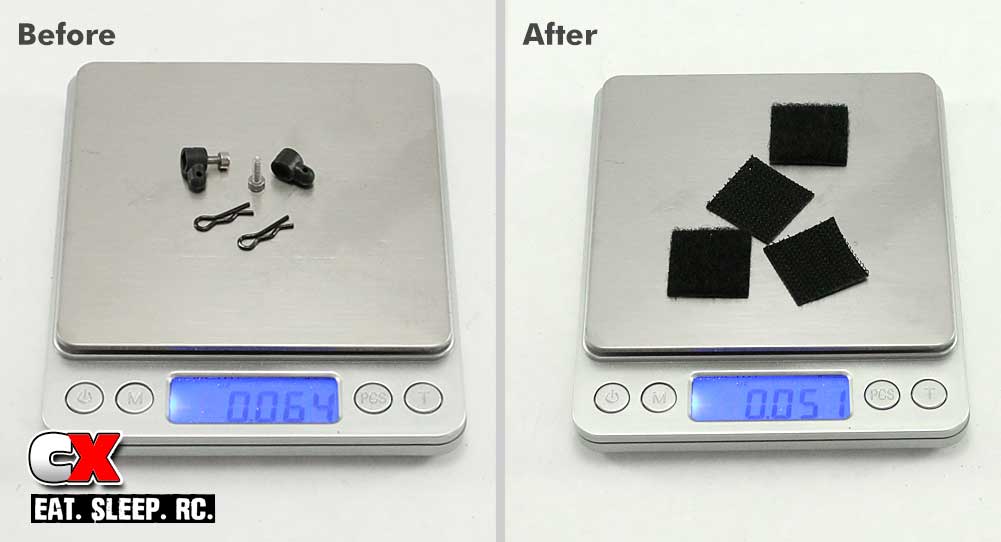
The final modification to the lightweight conversion was more for show than go, but actually turned out to save a bit of weight. I removed the stock ‘pin’ body mounts; two plastic mounts, the screws and the body clips. Instead, I added 4 pieces of Velco; two on each side of the chassis and the two mating pair on the body. Overall this saved about .36g. I know, I know, that’s so small, but in the grand scheme of things, it’s something. I’ll take it!
Lightweight Body Mounts
Original Part: .064oz (1.81g)
Upgrade Part: .051oz (1.44g)
Weight Savings: .013oz (.36g)
Total Weight Savings: 4.058oz (115.04g)
So there you have it, a Team Associated B5M diet plan that saved a grand total of 4oz (or 115g). So the next question is, did it work.
Before I give you the answer, let’s check the testing scenario. The location was www.ocrcraceway.com in Huntington Beach. The test sessions were both on a Tuesday (one week after another), both from noon to 6pm. Both times tested I was running the same electronics and same batteries. I mounted up a fresh set of tires for both sessions just to take tire degredation out of the equation. The layout was the same on both days, water-misters working, etc … both days were perfectly replicated.
Day 1
I have been working on an optimum setup for my B5M for a little while and, in its full-bodied form, the B5M worked great. I settled in to click off lap times in the low 24s/high 23s with the fastest being a solid 23.7. The car felt extremely consistent and very planted; it’s what I’ve been used to for some time now.
Day 2
With the updated car, I noticed the loss of 115g immediately; the B5M felt so spunky off the line and out of the corners, I knew the lap times were going to be much quicker. I was really confused when all I was hearing was low 24s with the best being a 23.9. Then I realized it; because the car was lighter, I could change the gearing to get a bit more speed. I also noticed that even though it seemed faster, the handling had dropped away a bit. You see, taking weight off the car changed the way it moved; there was less weight now being transferred around into or out of the corners.
I brought the buggy back in, changed the gearing (going up 2 teeth) and messed with the set up a bit, changing ride height, the rear toe block and the caster shims. Once I got the car to handle better, I had it clicking off mid-23s like flowing water, the best being a 23.3.
Now, you might be thinking that all this work for a best lap that is only 4/10s faster isn’t much progress, but I’ll have you know that it took alot less effort to get those lap times. Consistent high 23s were possible and, with a bit more testing, I bet I could drop those times an extra couple tenths, maybe even tickling the 22s.
These modifications have surely changed the way my B5M handles and shows some great progress. Hopefully this can help you get your buggy, whichever one you have, headed in the direction towards a podium finish at your track. Good luck!
Like this article? Then you might like another article we did building Budget Touring Car.
 CompetitionX CompetitionX is the most up-to-date source for RC Car News, Reviews and Videos for Radio Control. We also have the most comprehensive Manual Database on the web.

