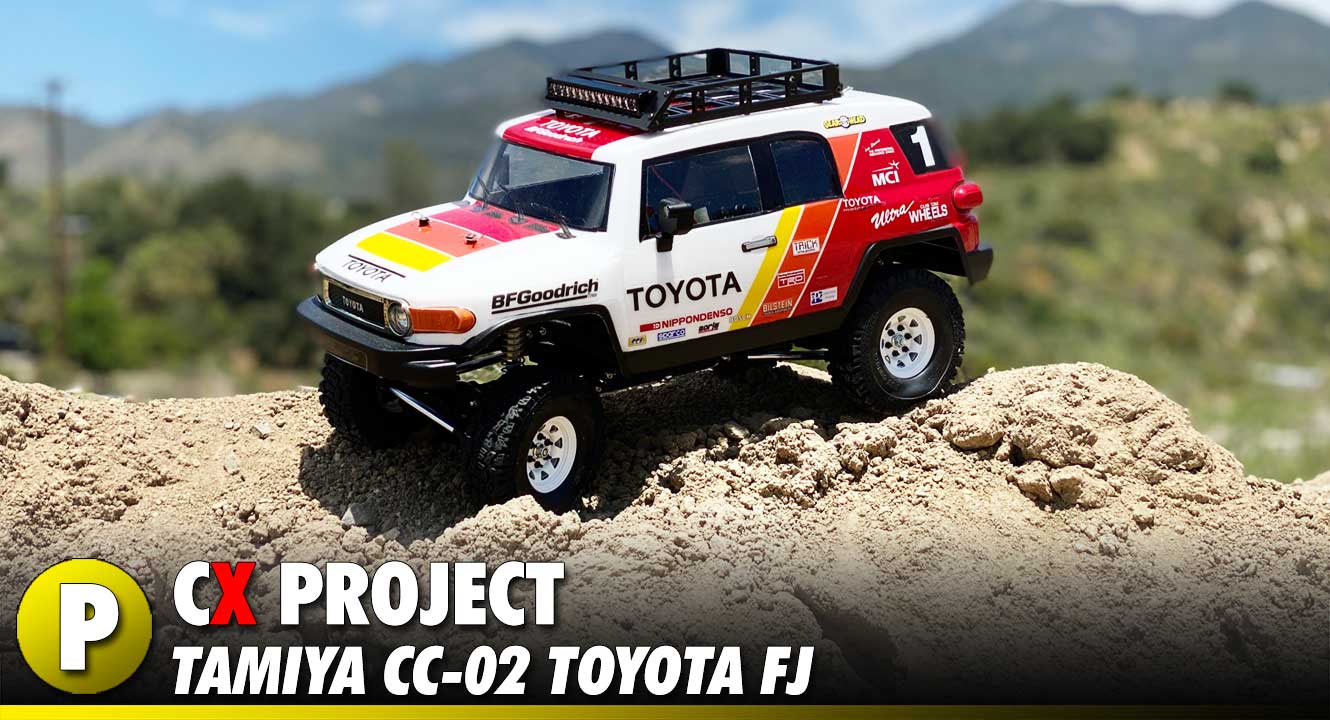
Tamiya CC-02 Toyota FJ Trail Truck
 This project started life as a standard Tamiya CC-02 rig, built right from the box with the stock electronics, wheels, tires, shocks and even the cool looking Mercedes G500 body. In stock form, it works pretty good but it’s in definite need of some upgrades, especially in the tire department.
Since I wanted to upgrade the tires first thing, I also thought about swapping out the wheels – which then lead to the shocks. Then the body. Then the electronics, then… then… then… Ya, the flood gates were open. So, we did some searching around and came up with some readily available products that helped transform the daily Merc driver into a quite-capable trail truck!
We’re going to go part-by-part to give you a heads up on everything used in this build. So, let’s get started.
Modifications
 Servo Upgrade
Every trail truck needs something stout in the servo department, so I yanked the semi-adequate stock Tamiya servo out and dropped in a Hitec D951TW replacement. Not only is the D951TW a high torque unit (capable of 486oz/in or pull), it also features a metal case and titanium geartrain! Yes, you read that right – titanium gears! But that’s not all this great servo offers – it has a speed of .14, a 25T output shaft and is water resistant (no full submerging for me – but I wasn’t planning on dunking this rig particular rig anyway).
Additional Pictures
Link: Hitec D951TW Titanium Gear Servo
Buy: On AMain
 Wheels and Tires
Next on the list, and probably the most crucial, was the wheels and tires. While I wanted to go with something really cool, I also wanted to keep them functional to the overall ‘view’ of this rig. So, I kept to the 1.55″ size and decided on a set of OEM 6-lug stamped steelies wrapped in Dick Cepek Fun Country tires (also in 1.55″ size). Both of these are from RC4WD. The wheels are multi-piece internal beadlocks and clamp together to hold the tire in place, while the tires are molded in RC4WD’s advanced X2 SS Compound (that equals Super Soft and Super Sticky). I wanted this truck to have a purpose – both in desert and on some rocking terrain. I think this setup will fill that bill perfectly!
Additional Pictures
Link: RC4WD 1.55″ Stamped Steel Beadlock Wheels
Buy: On AMain
Link: RC4WD Dick Cepek Fun Country 1.55″ Scale Tires
Buy: On AMain
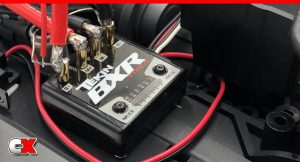 ESC and Motor
Since I wasn’t building a show pony, a power upgrade was definitely in order. But not just any upgrade, I wanted to go with a tried-and-true system that I’ve used before – that only means Tekin! The BXR and T35HD combo has been a brushed solution I’ve used in the past with excellent results – small footprint, smooth throttle, water resistant and an active drag brake system I swear by! It’s also LiPo compatible, so that opens the door to quite a few different battery options. This system is a perfect fit for the somewhat smaller CC-02 platform.
Additional Pictures
Link: Tekin BXR Rock Crawling ESC
Buy: At AMain
Link: Tekin T35 HD Brushed Crawler Motor
Buy: On AMain
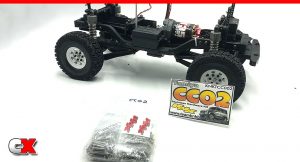 Screws
I know what you’re thinking – how is this an upgrade. Well, if you’ve ever built a Tamiya kit, you know that they only use Phillips-head hardware. Yuck. No one likes Phillips-head hardware. NO ONE. So, one of the first things I change on any Tamiya kit I build is that hardware – and that’s where Team KNK comes in. They offer a complete replacement stainless hardware kit – screws, washers, nuts – it’s all in there, separately bagged with size tags to make replacement easy!
Link: Team KNK Tamiya CC-02 Stainless Hardware Kit
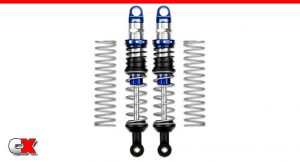 Shocks
Next to tires, shocks are probably the next most important upgrade you can do to your rig. The kit CC-02 shocks are probably more than adequate (being a much bigger bore helps), I do love the look and tuneability of the Pro-Line Pro-Spec shock kit. Different pistons and springs will help me tune the CC-02 to different terrain and, well, the aluminum just looks cool! I decided to go with the 90-95mm shocks (which are just slightly longer than the kit shocks) to allow more downtravel of the suspension – we’ll see if that plays a role in the handling of the ‘Yota.
Additional Pictures
Link: Pro-Line Racing Pro-Spec Scaler Shocks (90-95mm)
Buy: On AMain
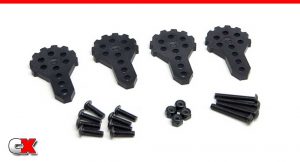 Shock Hoops
Originally designed for the Axial SCX10, this lift kit from Gear Head RC found it’s way to the CC-02 project truck. These allow you to raise or lower your truck, however rotating also changes the leverage of the rear shocks that can also change how the rear of the truck articulates. I tried a couple different mounting positions, but setting them up in this configuration worked the best (without having to do additional modifications). On the bench, I did notice the rear articulating with less pressure – can’t wait to see how it actually performs out on the trails!
Additional Pictures
Link: Gear Head RC Lift Kit
Buy: On Amazon
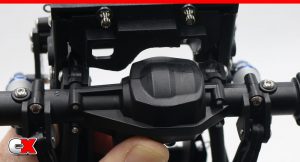 Rear Uptravel
This next mod is a freebie – nothing to buy – just a little cutting and trimming of the rear end parts. The result? More uptravel of the rear axle (works great with the rear shock hoop and Pro-Line shock install!).
The first is to remove the rear battery bracket ‘catch’. Easy enough
Second, grind away the ‘nubs’ that were used with the rear battery bracket catch – just make them flush with the chassis (see red arrow).
Next, take the rear bumper and remove some material (see silver Sharpie mark). This is where the rear pumpkin makes contact with it during up-travel.
Once completed, you can flex that rear end up enough that the shocks bottom out before the rear axle hits anything! MAXIMUM up-travel baby!
Additional Pictures
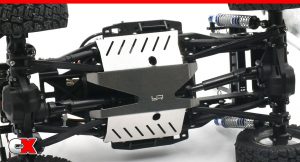 Transmission Skid Plate
The CC-02 belly is quite exposed – lots of transmission with nothing protecting it. I knew I wanted to keep the transmission safe from hard hits (and from catching on every rock I tried to roll over), so I opted to install a Yeah Racing Stainless Steel Skid Plate. Installation is super easy – remove 4 screws, drop the skid plate in place and replace them. Easy peasy!
Additional Pictures
Link: Yeah Racing Stainless Steel Skid Plate
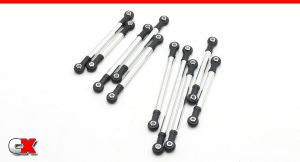 Links
Links
I wouldn’t normally change the links since the stock ones are a heavy duty plastic, but they do hang down quite a bit and I was concerned about them dragging on rocks during simple crawls. After doing some research, I found a full set of aluminum links available from Xtra Speed – front, rear and both steering links! The price was perfect as was the fit, and it does appear to give the ‘Yota a little more link clearance. Win, win, win!
Additional Pictures
Link: Xtra Speed Aluminum Link Set
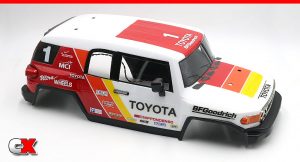 Body
Body
Firstly, I do love the Merc body. The detail (and molded parts) included build an absolutely amazing kit! That said, I wanted to mix it up a bit with a new lid – something cool, something different, something that would accept a killer paint. Yeah, I think I nailed it with the Tamiya Toyota FJ Cruiser!
The body is designed for the CC-01 (and CR-01) chassis but, thankfully, also works with the new CC-02. I sent it out to my ‘guy’ – pro painter Matt over at Sharkbait Designworks – and after a little discussion about what I was looking for, we worked out the Iron Ivan Stewart livery. After I got it back I proceeded to do a little sticker cutting here, some custom vinyl on the roof and – BAM – this thing is looking sweet!
Additional Pictures
Link: Tamiya Toyota FJ Cruiser Body
Buy: On AMain
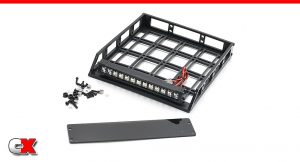 Roof Rack
Since my goal for the CC-02 was a cross between a trail truck and a desert runner, the final piece of the CC-02 puzzle (for now) was the installation of a roof rack and light bar. There are quite a few options out there but, with the CC-02 being a slightly smaller rig (and thus the body being slightly smaller), finding a suitable rack/light bar option could be difficult.
That is until I found the Trail Torch Lightbar/Rubicon Roof Rack Combo from Gear Head RC. Even though these are separate parts, their combo is designed for them to work together to form a really nice rack setup. It mounted perfectly to the roof the FJ – not too wide, not too long – and will allow me to carry some important trail gear up top (once I figure out what that is). The light bar is also hella-bright, so night driving shouldn’t be much of a problem at all.
Additional Pictures
Link: Gear Head RC Trail Torch/Rubicon Roof Rack Combo
Buy: On Amazon
Final Thoughts
This project came out great but it’s still not quite complete. I need to figure out a front/rear bumper solution and, well, some scale items for the roof rack (got any ideas?).
But I’m not going to wait for that stuff to drive it – I’ll be heading out for a shakedown run here soon and will be sure to click off some more photos (and video) of the Ironman FJ in action!
Stay tuned for a Part 2 of this build – you know, because they’re never really done…
Additional Pictures
 CompetitionX CompetitionX is the most up-to-date source for RC Car News, Reviews and Videos for Radio Control. We also have the most comprehensive Manual Database on the web.


I wish there was a Land Cruiser body set (FJZ80) to fit this build. Until then, I’ll enjoy the G wagon with the lights installed. I love driving it at night.
I like the idea of a LC FJZ80 as well! I’m sure, in time, someone will come out with one. The CC-01 was a popular ride that acquired quite a bit of momentum at one point – I’m sure the CC-02 will as well.