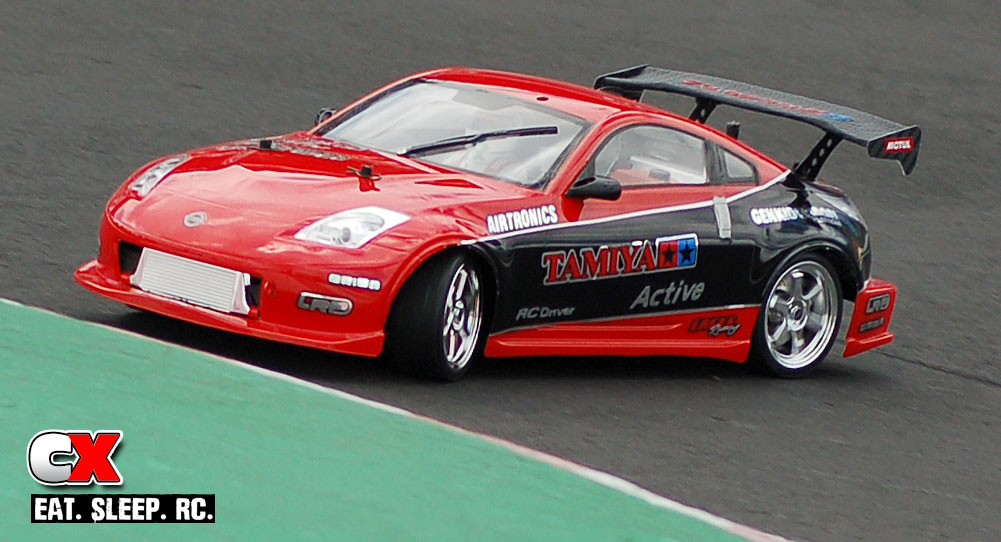
Get Your Drift On – Tamiya Style
For those of you that aren’t savvy with the whole drift thing, I suggest you give it a look. There’s just something exciting about driving a car into a corner at 80+ mph … SIDEWAYS! The flashy paint jobs, the sound of the huge horsepower engines and the smoke billowing from the rear tires are all indications that you have been witness to one of the fastest growing forms of motorsports. I’ve attended a few drift events and can say that it does take an immense amount of skill (and, ummm, cajones) to whip the rear end out and keep your foot in the throttle! While some make it look so easy, a vast majority end up loading their wrecked heaps onto a flatbed for the long drive home. I’m pretty confident to say that I’d be in that latter group, so I decided if I want to join the ranks of the drift world, I’d do it on a much smaller scale.
 Chassis & Suspension
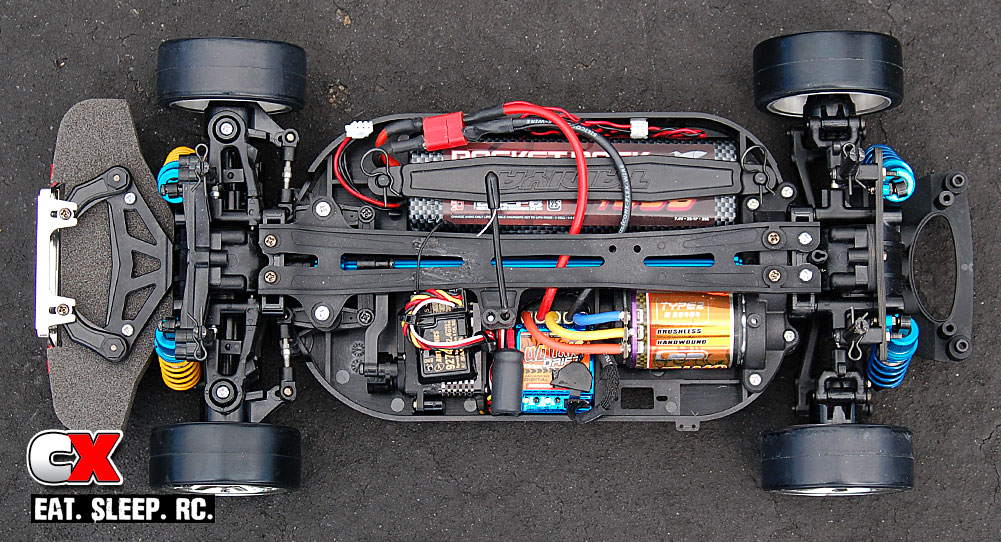
While it is possible to create a decent drift car with almost any chassis out there, I chose the Tamiya Nissan Fairlady Z Ver Nismo for a couple reasons. One, I like the shaft drive setup. This setup encloses the differentials and drive gears from any debris that might be kicked into the chassis while drifting on any not-so-clean surfaces. I also think that the shaft-drive is more responsive than any belt-drive setup. Secondly, there are quite a few hop-ups available for the TT-01E that will help me tune the Nissan to super-drifter status. And lastly, it’s a Nissan Z…plenty of those in the 1:1 scale drifting scene. This should fit the part nicely.
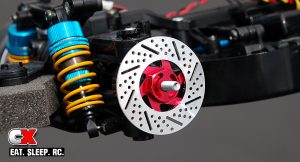
As far as suspension setup and upgrades, this area can make or break your drifter. So, I did a little homework to see how other RC Drifters are setting up their cars. After some ‘light’ reading, I decided to take what I’ve read and see if I could come up with my own setup. I started by swapping out the stock plastic-bodied shocks with Tamiya’s high-end TRF Dampers. I filled the fronts with 30wt oil and Tamiya Yellow Springs and the rears with 35wt oil and Tamiya Blue Springs. While most drifters like to use an adjustable front differential, I was feeling a little crazy and dropped in the TT-01 Front One-Way Unit. This should make my drifter pretty aggressive, but that’s the way I like to drive. For those that want a car that is a little easier to drive, I would suggest building the stock gear diff and adding a light grease to help calm the car down. For the rear end, you want the differential to be locked as this helps initiate the drift motion. I built the stock gear unit per the manual but added 100% Silicone Gasket Sealant to the inside. It’s cheap and easy to work with and only takes a few hours to dry. Once dry, it basically ‘glues’ the gears together creating a locked diff. For tuning, I added Tamiya’s Turnbuckle Tie-Rod Set (for steering, set at 0 degrees toe) and Upper Adjustable Arm Set (for front and rear camber). I set the camber (both front and rear) to 0 degrees. You can start at something different but because the tires are a hard plastic they tend to flatten themselves back to 0 degrees after a few battery packs. To lighten the drive train and make the shaft drive even more responsive, Tamiya’s Aluminum Propeller Joint and Shaft Set replaced the stock flexible plastic unit. A Carbon Fiber Rear Damper Stay (or shock tower) was installed as was the Aluminum Motor Mount. This aluminum unit helps dissipate heat from the motor.
 Electronics
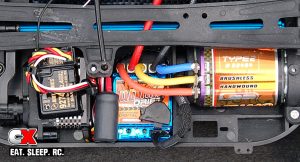
When it’s time to build your drifter, there are a few requirements you need to pay attention to in the electronics department. First off, you need some decent power to constantly keep all four tires spinning no matter what surface you run on. I chose the LRP Ultimo Drift combo for two reasons; one, LRP has designed and optimized this system specifically for drifting and two, it has the word ‘Drift’ in the name so it has to be good! The Ultimo Drift includes LRP’s standard features like the Sensored Technology, automatic NiMh/LiPo adaptation and internal temp-check system. LRP has also included special drifting throttle and brake profiles, including a simulated handbrake effect. The motor and ESC are nothing without a good battery pack, so to keep the juices flowing I dropped in a Team Orion 4000mah Rocket Pack LiPo Pack. The Rocket Pack comes in a cool carbon-look hard case and includes a 3-pole balancing connector. It is also pretty light (as most LiPos are), and helps neutralize the side-to-side balance of the car. Keeping the car headed in the right direction while sliding sideways is also crucial, so for directional duties I installed Hitec’s fastest standard size servo, the 7940TH. This super-servo includes titanium gears, an ultra-performance coreless motor and Hitec’s high resolution “G2” second generation programmable digital circuitry. The 7940TH also has a sweet looking heat-sink case, perfect for the constant countersteering I’ll be doing. And finally, complete control from a distance is critical, so the Airtronics M11x was my controller of choice. This high-end radio system touts years of race-winning features including dedicated 2.4Ghz, lightning-fast FHSS-3 Sanwa technology and 30 model memory. It also features a fantastic menu system that makes making changes quick and easy.
 Body, Wheels & Tires
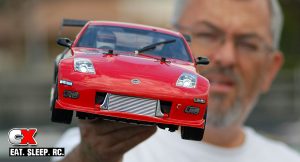
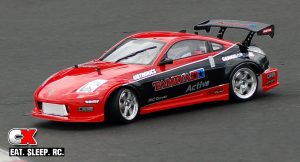
Ah, my favorite part of any project build is the body, wheels and tires. Thankfully, this project was no exception! As I mentioned before, The Nissan Fairlady Z is the perfect canvas for some drift love, but I didn’t want it to be too complicated (I’m sure I’m going to be sliding into quite a few obstacles). I started with a simple red and black paint scheme and added a thin chrome pinstripe to match the killer Tamiya DriftSpec 6-Spoke Metal Plated Wheels. These wheels are wrapped in Tamiya’s Type D Drift Tires and, for a few additional style points, a full set of Eagle Racing 38mm Brake Disc Wheel Adapters were added. Chrome light buckets with Tamiya’s LED Light Unit were installed on the front and rear of the Nissan. Rear-view mirrors, windshield wiper, shark-fin antenna and intercooler from Tamiya’s RC Touring Car Body Accessories Set were also added, and I carefully cut out the front grill to let the IC shine through.
The killer wing set is from Active Hobby Products and is covered in 3M’s new Carbon Fiber tape. This stuff not only looks awesome, it even has a texture to it! Shadowed by the beautiful carbon-look wing is a Speed Way Pal Dual Exhaust complete with simulated heat-treated tips. I also added custom tow hooks that were made from small electrical eyelets that I painted red. For a little added bling, custom vinyl stickers were cut (thanks to Charlie Barnes of CFX Paintworks) and tediously layered the body panels. To finalize the body, I painted and installed Tamiya’s Scale Touring Car Cockpit Set complete with a ‘Stig’ look-a-like and a custom hanging air freshener.
 The Drive
In the drift world, two terms are used to describe all the different forms of road racing; Drift and Grip. Grip cars race around a given track with all kinds of traction thanks to super sticky tires. They’re basically rated from 1st place to last, the winner is the one that can get around the track fastest. Drift, however, is a little different. The Drift guys race around that same given track, only most of the time they’re travelling sideways! Drift cars ‘points’ are based on a number of factors, two important ones being speed and the angle at which the car is travelling through a corner. The more speed and the more angle you achieve through a corner, the more points you can accumulate.
My goal with Project Drift was to find a setup that could provide as much speed and angle as possible. The testing grounds for this project was none other than the world famous Tamiya Track in Aliso Viejo, California. I’ve raced many times on this track and thought that the jet-black asphalt and raised curbing would be the perfect backdrop for some drift action. After I took a few of the beauty shots, I set the car down and took a few warm-up corners. The Nissan felt pretty good…power was extremely smooth and controllable thanks to LRP’s Ultimo Drift combo. I even gave the Hitec servo a brutal workout with the constant countersteering I was doing through the large Tamiya sweeper! I did feel, however, that the Tamiya DriftSpec Type D tires had a bit too much traction for asphalt use. I did have to really pitch the car to get the initial drift started, and what seemed like quite a bit of throttle to keep it sideways. These tires would probably be best on carpet or slick concrete. I will be trying some other drift tires in the future to really fine tune my sideways saloon!
Final Thoughts
Any custom project is a lot of fun, but this one has been one of my favorites. I think the Nissan came out pretty cool and should last a long time since, well, you really aren’t going all that fast. Electronic packages are relatively inexpensive and you really only need one battery pack. Plus, with hundreds of different ways to customize the body, interior, wheels and tires you should have no problem coming up with a completely unique drifter! So if you’re looking into a new and challenging segment of the hobby that will allow you to create a custom masterpiece without having to spend a lot of money, give RC Drifting a try.
Parts Used
Tamiya
www.TamiyaUSA.com–
• Nissan Fairlady Z Ver Nismo TT-01E, #58402
• TT-01 Front One-Way Unit, #53671
• Adjustable Upper Arm Set, #53674
• TT-01 Turnbuckle Tie-Rod Set, #53662
• TT-01 Metal Motor Mount, #53666
• TT-01 Type-E Carbon Damper Stay (Rear), #54060
• TT-01 Aluminum Propeller Joint & Shaft Set, #54026
• 1/10 Scale RC Touring Car Body Accessory Parts Set, #54136
• 1/10 Scale Touring Car Cockpit Set, 54157
• TRF Damper Special Set, #49355
• DriftSpec 6-Spoke Metal Plated Wheel w/Drift Tire Type D, #53960
• On-Road Tuned Hard Spring Set, #53440
• RC LED Light Unit, #53909
LRP
Distributed by Team Associated
www.RC10.com–
• Ultimo Drift Brushless ESC, #LRP80460
• Ultimo Drift Type 2 Brushless Motor, #LRP50484
Hitec
www.HitecRCD.com–
• HS-7940TH High Speed Coreless Servo, #37940S
Team Orion
www.TeamOrion.com–
• 4000 25C LiPo Rocket Pack, #ORI14107
Airtronics
www.Airtronics.net-
• M11X 2.4Ghz, #751568
Active Racing Products
Distributed by Genkidoridori
www.GenkiDoriDori.com–
• GT Rear Wing Set, #STR012
Eagle Racing
Distributed by Genkidoridori
www.GenkiDoriDori.com–
• Brake Disc 38mm Wheel Adapter, #2953-064
CFX Paintworks
www.CFXPaintworks.com–
• Custom stickers
Gallery
 CompetitionX CompetitionX is the most up-to-date source for RC Car News, Reviews and Videos for Radio Control. We also have the most comprehensive Manual Database on the web.



3 comments
Pingback: Builds: Project Tamiya Drift TT-01E
Pingback: TT-01D hopup - R/C Tech Forums
Pingback: TT-01 Forum - Page 153 - R/C Tech Forums