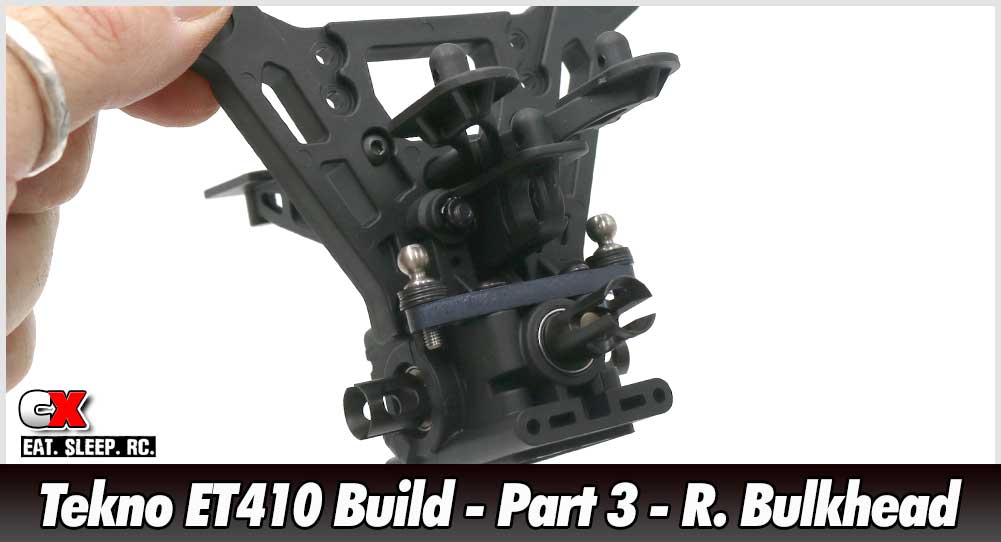
In Step 3 of our Tekno ET410 build, we assemble the rear bulkhead; shock tower, camber link mount and body mounts.
Build Notes:
 In Step 7 we’ll be using CA glue to keep some locknuts in place. You’ll only need a small drop – be careful you don’t glue your fingers to the plastic!
In Step 7 we’ll be using CA glue to keep some locknuts in place. You’ll only need a small drop – be careful you don’t glue your fingers to the plastic!
Step 1:
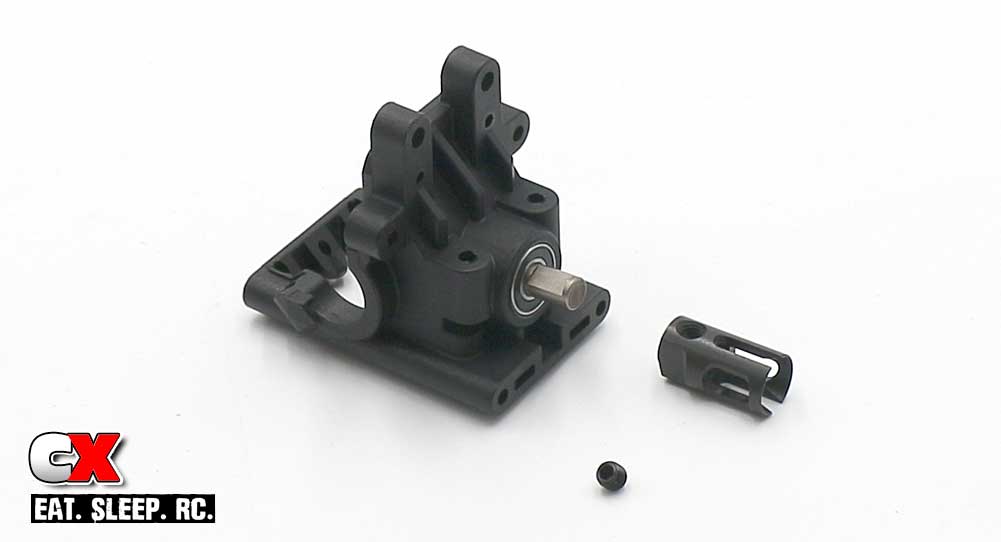
The rear bulkhead goes together much like the front; press the two bearings into place, slide the output shaft through and secure the outdrive with the M4x4mm setscrew. Blue threadlocker is suggested here.
The rear bulkhead goes together much like the front; press the two bearings into place, slide the output shaft through and secure the outdrive with the M4x4mm setscrew. Blue threadlocker is suggested here.
Step 2:
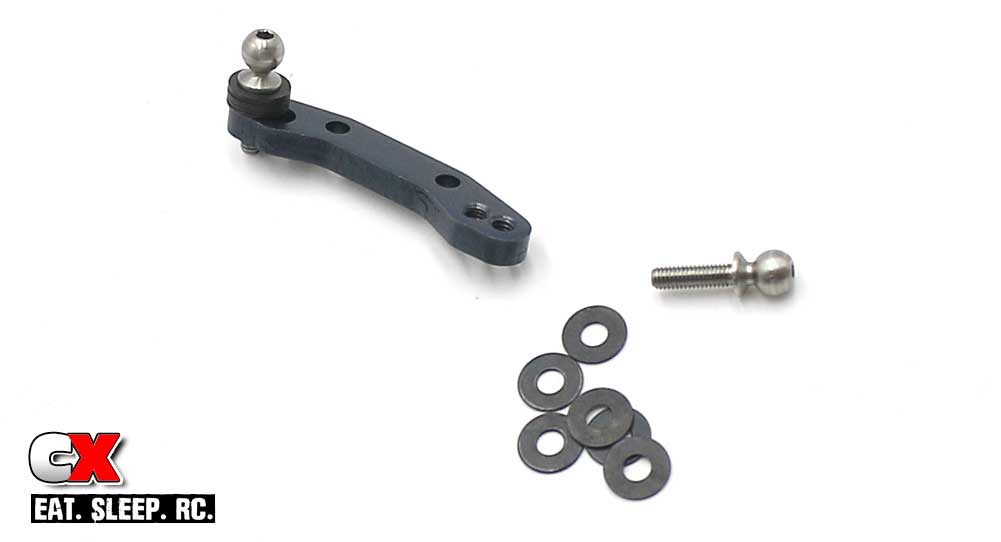
Using 6 of the shims, feed the 10mm ballstud into the mount. Blue threadlocker is suggested here.
Using 6 of the shims, feed the 10mm ballstud into the mount. Blue threadlocker is suggested here.
Step 3:
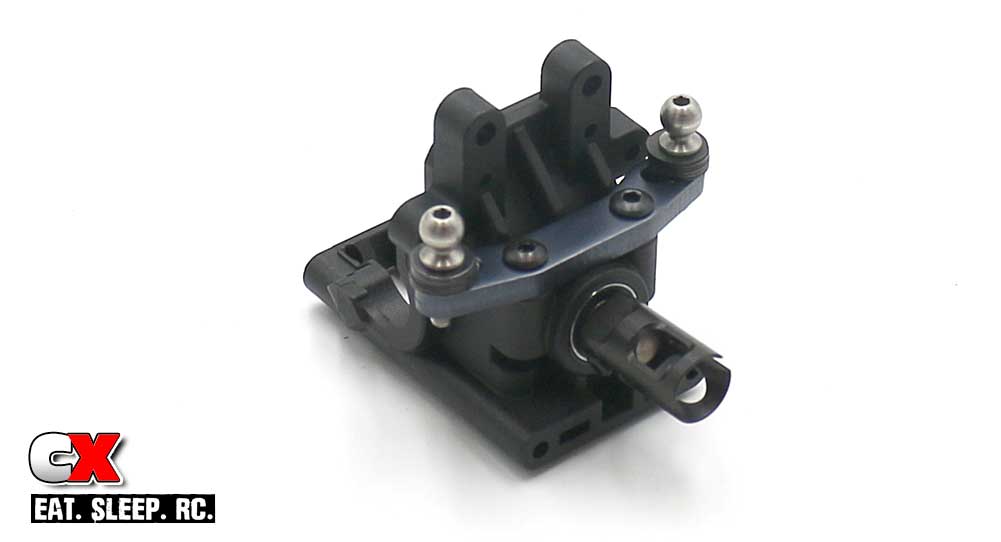
Attach your assembled camber link plate to the bulkhead.
Attach your assembled camber link plate to the bulkhead.
Step 4:
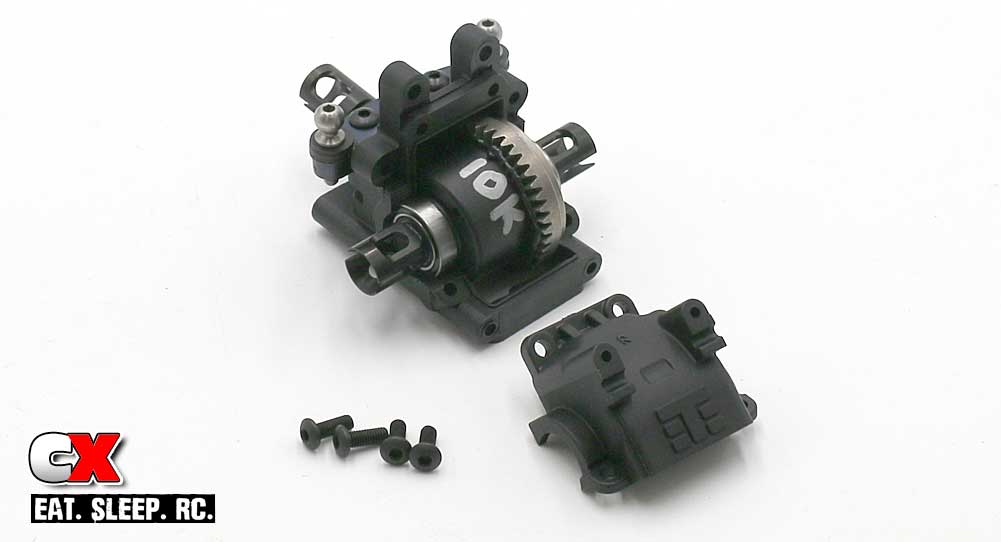
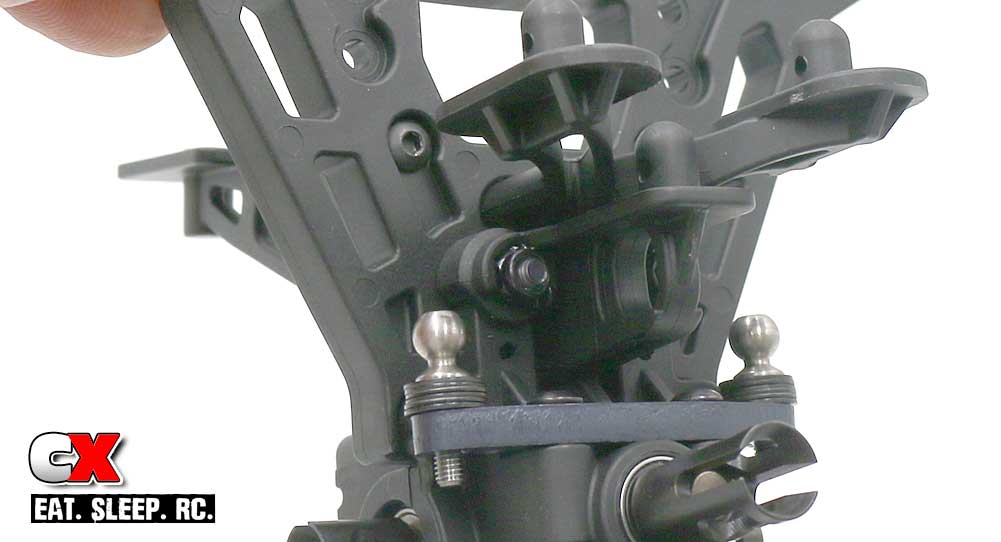
Grab your rear diff and slide a 10×15 bearing onto each side of it, then drop it into the bulkhead as shown. Make sure you put a light bead of black grease on the gears. Cap off the bulkhead and use the four 8mm screws to keep it in place.
Grab your rear diff and slide a 10×15 bearing onto each side of it, then drop it into the bulkhead as shown. Make sure you put a light bead of black grease on the gears. Cap off the bulkhead and use the four 8mm screws to keep it in place.
Step 5:
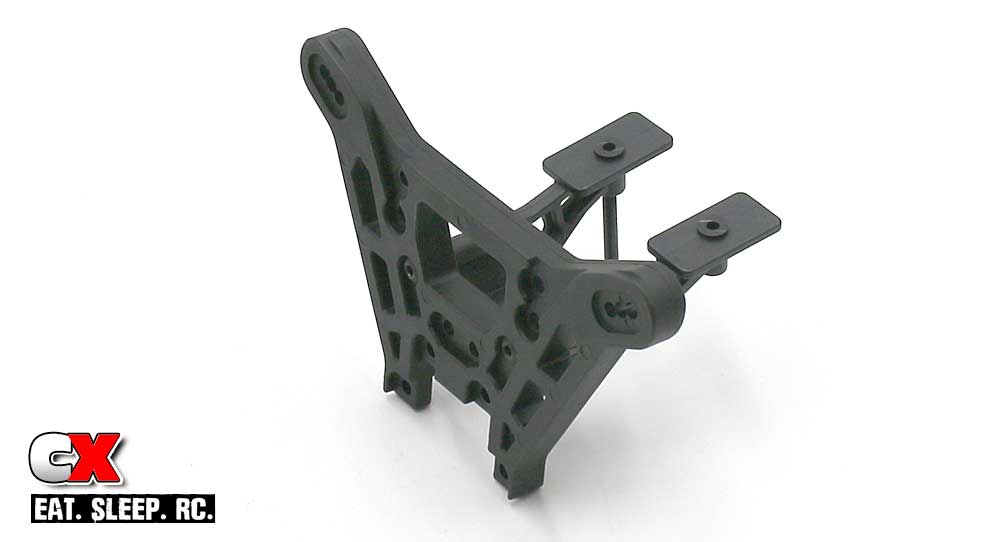
Attach the wing mounts to the rear tower. Note the orientation of the tower.
Attach the wing mounts to the rear tower. Note the orientation of the tower.
Step 6:
Attach the body mounts to the tower.
Attach the body mounts to the tower.
Step 7:
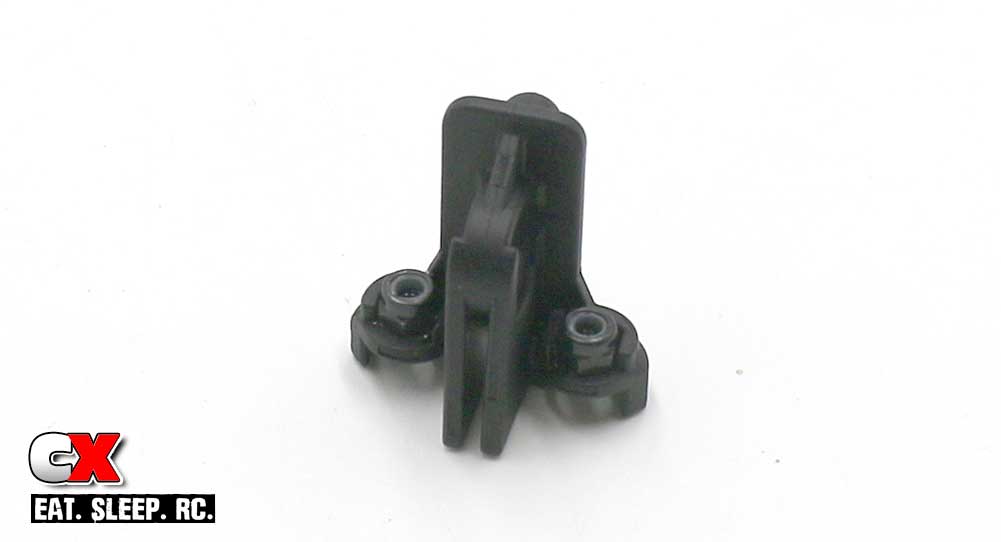
Assemble the additional body mount. You don’t actually use this as a body mount (it’s more for the EB410), but you do need it in place to help keep the wing mount attached.
Assemble the additional body mount. You don’t actually use this as a body mount (it’s more for the EB410), but you do need it in place to help keep the wing mount attached.
Manual states to add a drop of CA glue to the locknuts to keep them in place.
Step 8:
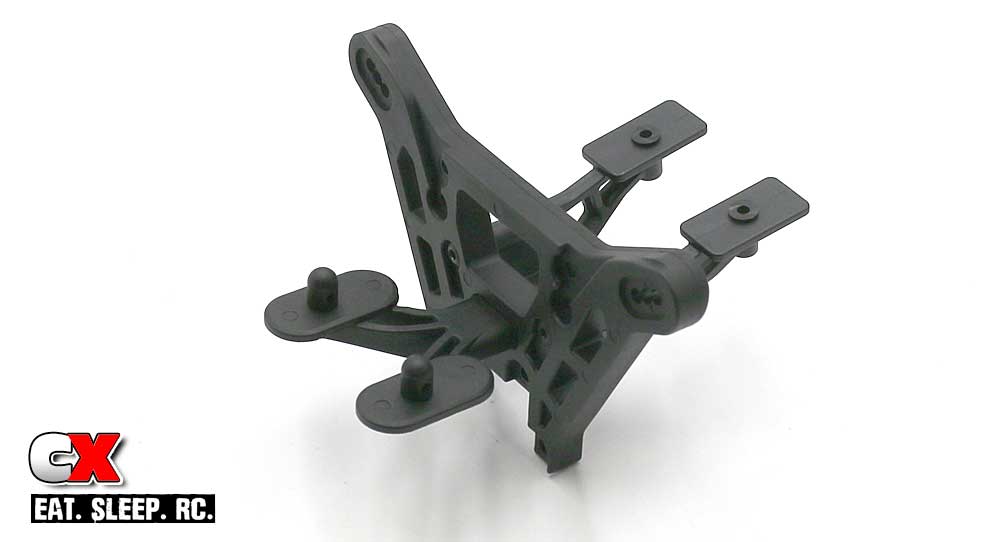
Attach the shock tower assembly to your rear bulkhead.
Attach the shock tower assembly to your rear bulkhead.
Step 9:
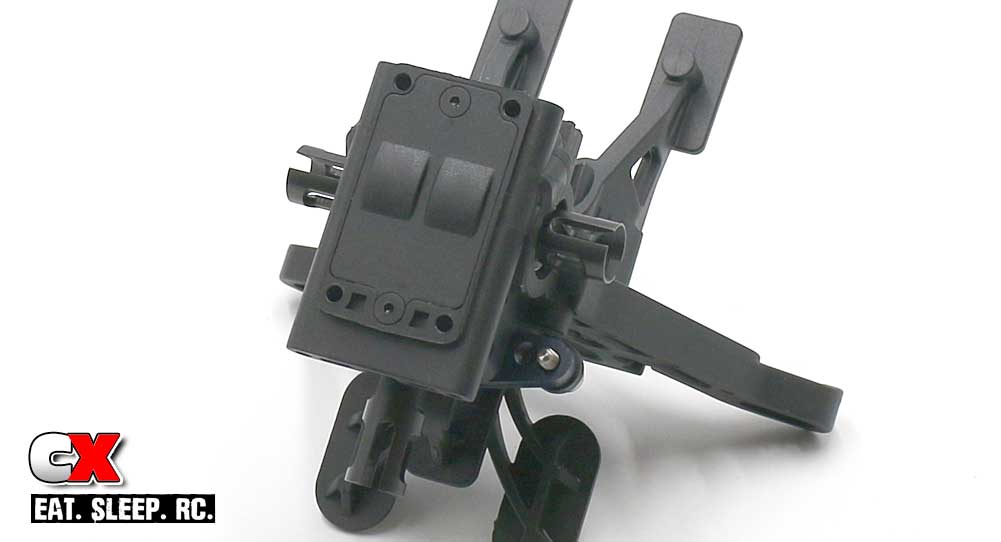
Final step is to cap off the bottom of the bulkhead using the M2.5x6mm screws to keep it in place.
Final step is to cap off the bottom of the bulkhead using the M2.5x6mm screws to keep it in place.
Another simple step. Both bulkheads are done, time to get the suspension mounted up!
Use the links below to follow each step.
Tekno ET410 Truggy Build – Opening Page
Tekno ET410 Truggy Build – Part 1 – Differentials
Tekno ET410 Truggy Build – Part 2 – Front Bulkhead
Tekno ET410 Truggy Build – Part 3 – Rear Bulkhead
Tekno ET410 Truggy Build – Part 4 – Rear Suspension
Tekno ET410 Truggy Build – Part 5 – Front Suspension
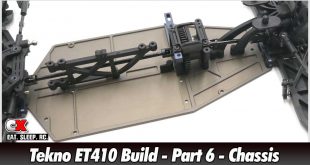
Tekno ET410 Truggy Build – Part 6 – Chassis Assembly
Tekno ET410 Truggy Build – Part 7 – Shocks
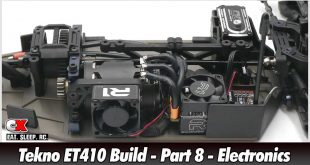
Tekno ET410 Truggy Build – Part 8 – Electronics
Tekno ET410 Truggy Build – Part 9 – Final Assembly
Tekno ET410 Truggy Build – Opening Page
Tekno ET410 Truggy Build – Part 1 – Differentials
Tekno ET410 Truggy Build – Part 2 – Front Bulkhead
Tekno ET410 Truggy Build – Part 3 – Rear Bulkhead
Tekno ET410 Truggy Build – Part 4 – Rear Suspension
Tekno ET410 Truggy Build – Part 5 – Front Suspension
Tekno ET410 Truggy Build – Part 6 – Chassis Assembly
Tekno ET410 Truggy Build – Part 7 – Shocks
Tekno ET410 Truggy Build – Part 8 – Electronics
Tekno ET410 Truggy Build – Part 9 – Final Assembly