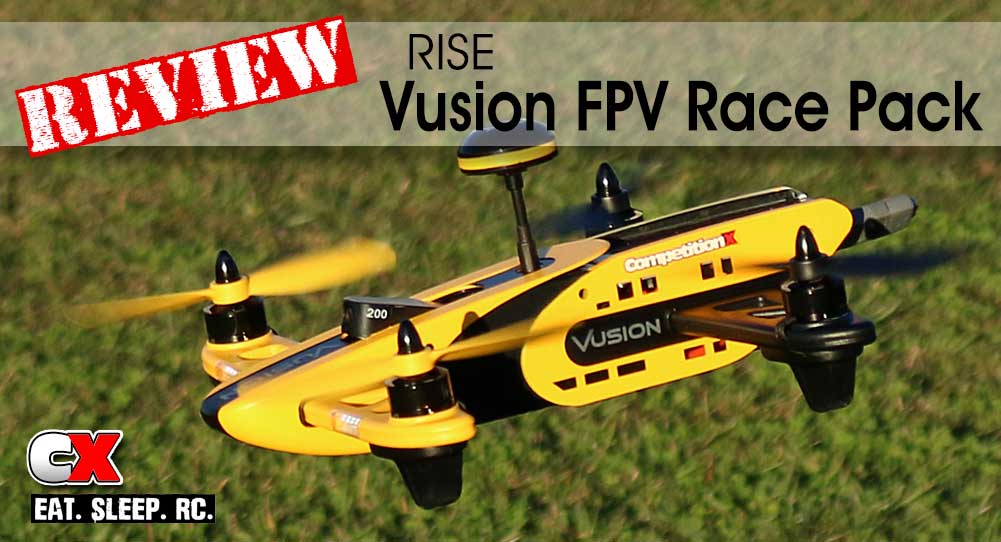
FPV Race Drone for the Beginner
I won’t lie when I say that I’ve been eagerly eyeballing the fast-growing Drone market. I’ve raced some fast cars but taking my skills to the air, well, my biggest fear with jumping into drones is my shear lack of successful flights; I don’t want to spend time and money on a rad race drone only to send it into the ground on its maiden flight.
You can see my uncertainty … that is, of course, until I came across the RISE Vusion Extreme FPV Race Pack. This is an all-inclusive FPV bundle that includes the drone, radio, goggles, monitor and camera – all pre-installed, all tuned up and ready for you to pull it from the box and get it in the air. This is the perfect starter pack for someone interested in diving into the FPV market (me) without having to spend a ton of money to find out if they like it (me). Being my first FPV airframe, I also thought it smarter to crash this drone than a super expensive full-tilt racer. However, I was more than surprised at its performance and my ability to keep it in the air! Read on, fellow first-time flyers!
Product: RISE Vusion 250 Extreme FPV Race Pack
Part Number: RISE0200
Type: FPV Drone
Price: $349.99
Recommended For: First time FPV’ers looking for an everything-included setup
-Video Coming Soon-
Features
 Chassis
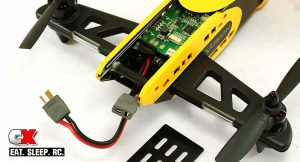
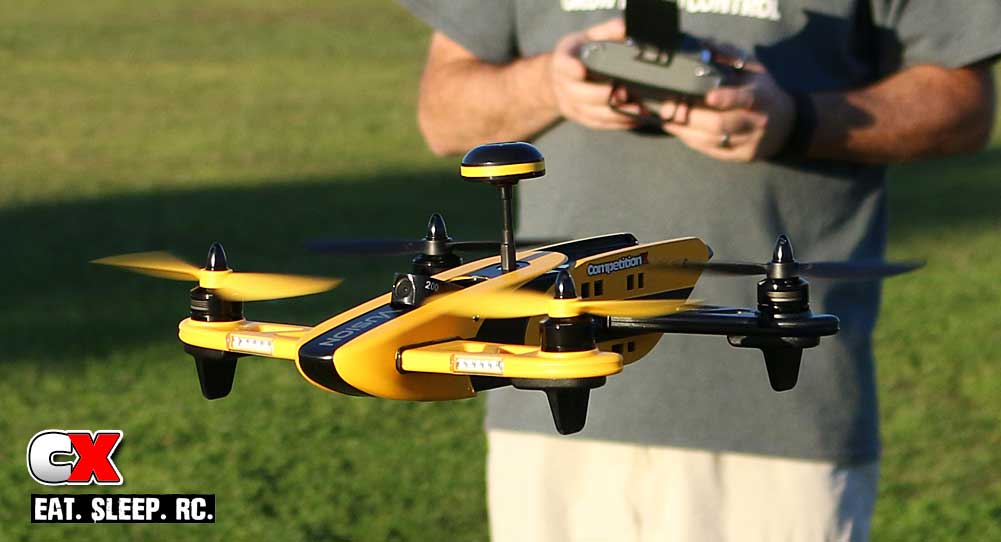
The RISE Vusion FPV Racer comes fully assembled; even the props are attached. All of the electronics are guarded by the black and yellow, multi-piece bumblebee shell. I actually like the styling and color, plus it makes it very easy to see while in the air. To help with that point, the front arms are fitted with white lights while the rears fitted with red.
Should you need to access any of the internals, each panel can be removed with the extraction of a few screws. The rearmost upper area (and lower battery door) are both vented to help with airflow and keep the heat levels low.
One super cool feature is the arms themselves. They are modular, meaning the arm, motor, blades, lighting and stand are all included as one piece; all pre-wired into a receptacle at the end of each arm. If you need to replace the arm, simply unplug it from the Vusion and replace with a new arm assembly. So very Plug-N-Play!
 Camera
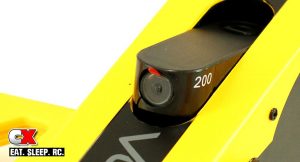
The 600TVL resolution camera is mounted on a pivot located on the top of the Vusion. Press one end into the body of the drone and the camera appears. It’s at the perfect angle for mild to high-speed flying, but is blinded a bit by the body when doing any level strafing runs. Pictures and recording are great and activated from the transmitter, recording photos at 2MP and video in 1280x720p and 30fps (accessed through a memory slot on the right side of the drone). The final video is recorded in a standard AVI format.
 Transmitter
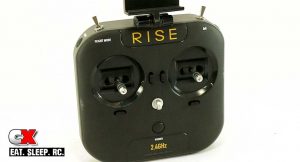
RTF drones usually include janky transmitters, but the one included with the Vusion just ain’t so. It’s a 6-channel, 2.4GHz unit that has a nice solid feel in your hands. The face features dual sticks, multiple trims, the power button and a lanyard ring for those that are prone to dropping things. Two switches adorn the top – one for flight modes and one for dual rates – with the picture button on one side and the video button on the other. A separate monitor cradle attaches to the top that can even accept phones as large as the iPhone 6S. Four AA batteries install in the back; included with the Vusion.
 Goggles
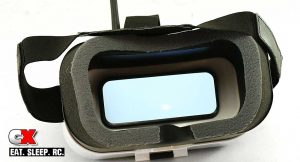
The goggles included with the Vusion are, ummm, quite big. However that’s the only real thing I can say negative about them. They’re designed to accept the FPV monitor; simply open the flap, set the monitor in place, close the flap, lock it and wah-lah – ready to accept the FPV signal from the mushroom antenna on the drone.
Believe it or not, the headstrap is adjustable. I didn’t notice it at first and tried it on – it about crushed my dome. My dad was watching (and laughing) and filled me in that the straps use Velcro for adjustment – glad he was around or I’d have jello-head right now. Once loaded and adjusted, the goggles do add a bit of weight to the front of your head but, as I found out, tilting your head down a little helps alot!
 Monitor
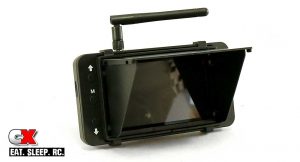
The included monitor is actually quite nice. It’s a 4.3″ color LCD that has a screen resolution of 480×272 and works on 5 bands (A, B, E, F and R). It uses 5.8GHz tech to talk to the drone and includes a RP-SMA 3dBi whip antenna. Surrounding the LCD screen on the front are a myriad of buttons; one for Up and Down selection, a Main Menu button and one for Channel select, Band Select and DVR Start/Stop. The power button and charge jack are located on the right side of the unit.
When on, the screen not only displays the FPV view, it also has a few items on the HUD (Heads Up Display). It shows the Total Time, FPV Band, FPV Channel, FPV Frequency and Battery Charge. Another icon is displayed if the Memory Card is installed as well as the Video Clip Timer (if you’re actually recording video).
There’s also some selections your can alter in the Main Menu; Brightness, Contrast, Color, Language, the Backlight and a full-monitor Reset.
But wait – there’s more. The monitor also comes with a sun screen if you’re not using it for FPV. The only thing I can criticize it on is the fact that a charger is not included with it. I had to do quite a bit of digging around my house to find one that worked.
 Flight Modes
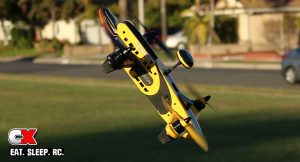
The final feature I want to touch on is the Flight Modes. The Vusion comes with three different ones; Mode 1, Mode 2 and Mode 3.
Mode 1 is the suggested setting for beginners. It features auto-level and mild roll rates for easy flying. It also limits the tilt angles so you can fly around with full-stick inputs and not worry about driving the drone into the ground – well, still possible, but much easier to avoid.
Mode 2 keeps the auto-level feature engaged but allows a more aggressive roll rate and tilt angle. If you’ve proven your prowess with Mode 1, take a step up for a little more advanced flying.
Mode 3 is all out banzai mode – no auto-level, no limits on tilt and extremely fast roll rates. Suggested for super heros, 10-year olds with super reflexes or those have have cash to repair the Vusion. Alot. I’m going to work my way here someday. Maybe the next time I’m 10 years old.
Flight Time
Before you can take flight, there are a few things that RISE suggests; attaching the FPV antenna, charging and installing the battery and sensor calibration. Attaching the antenna is a pretty simple process and screws on to the top of the drone. To install the battery, slide the hatch cover off from under the drone, wedge the pack into its safe place and slide the hatch back on. Small tabs lock it in place and keep the battery secure – I know, I tested it a couple of times. Finally, the sensor calibration. This is only required before the first flight but, if you’re like me and bind multiple drones to the same radio, I suggest doing it each time.
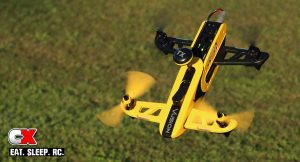 Lucky for me, I have a huge park right across the street from my house with quite a few large, open areas void of any trees. This would be the test bed for both LOS and FPV flights with the Vusion; LOS first, though. I wanted to get the controls down and take a few pix and video before trying my hand at FPV.
With the battery installed, I placed the Vusion on a flat surface and fired it up by plugging in the battery. I turned on the transmitter and was ready to rock, however the first thing I needed to do is arm the motors. This is a nice feature with any beginner drone; after 3 seconds it disarms the motors so, should you accidentally hit the throttle stick while picking it up, you don’t shear off any fingers. Arming the motors is as easy as moving the yaw control (left stick) down and to the right – after a second or two you’ll see the drones blades spool up slightly. Both the Vusion and I were ready to go; slow movements on both sticks and the drone was airborne. I started in Mode 1, the lowest setting and one that made the Vusion very comfortable to fly. I zoomed back and forth, each time getting a little more aggressive with my approach angles and speed. While in the air, I paused a moment to click off a few photos and video; the quality is good in both, especially since it records right to an onboard Micro SD card and doesn’t have to compress to send to the transmitter.
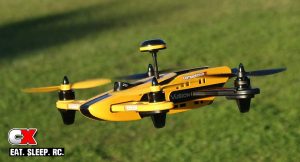 I’d like to also mention that it is pretty damn durable; let me tell you a fun story. The one feature that I like about it (Auto Shut-off Mode) is also the same feature that came back to bite me. The Auto Shut-off Mode basically kills power to the motors if the left stick is held in the down position for more than 3 seconds. However, since the Vusion doesn’t recognize where it is when this happens, it became a feature that almost destroyed itself. To demonstrate (not on purpose), I lifted the Vusion high into the air to get a good picture of the local mountains; it’s been raining alot here in SoCal and left behind quite a bit of snow. After I clicked the shot, I thought I would be cool and cut the power, let the drone freefall and gather it back up when it got close to the ground. You see where I’m going with this, right? Well right about the time I started throttling up, I heard a familiar beep from the drone letting me know it has safely cut the power. Of course I panicked and, instead of quickly re-arming and pulling out of this precarious position, I watched the Vusion slam the ground. Hard. Luckily for me it hit almost dead flat. After running over to it, I noticed it seemed fine and instead of picking it up, I tried arming the motors and flying away – which it did without any issues. Yeah, amazing, and I’m sure VERY lucky. I won’t be trying that again any time soon!
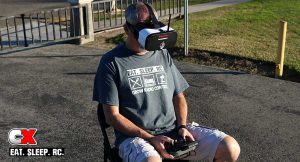 While not 100% comfortable with FPV yet, I knew I couldn’t give a complete review without at least trying it. I loaded the monitor into the goggles and headed back across the street with a fully-charged 3S LiPo. With my chair in place (and a spotter so I didn’t take out any unsuspecting pedestrians), I slowly throttled up and sent the Vusion skyward. It’s a little weird not having peripheral vision but I actually got the hang of it, sort of. My flight was a bit wobbly and it took a few minutes (ok, almost the entire pack) to settle the controls down, but overall I feel like I did a good job! I kept it away from trees, people, buildings and, most of all, I kept it in the air. It was a TON of fun and I am SOOOOO hooked. I have to attribute my first-FPV-flight success to some video gaming; one game I play often is called Battlefield. I often jump into the helicopters to carry troops to the front lines as well as rain hell from above, so I do have a little bit of kinda-FPV experience. The biggest difference – I’m actually TRYING to keep the Vusion in the air. Sometimes not so much with the BF heli.
Additional
• Nothing. Everything is included in the box
• n/a
Spec Data
Diagonal Size: 9.84″ (250mm)
Height: 4.3″ (110mm)
Weight: 1.76lbs (502g)
Propellers: 5×4.5 Bullnose; 2 CW, 2 CCW
Electronics
Motors: 2280kV – 4; 2 CW, 2 CCW
ESC: OneShot 125 – 4
Radio: 2.4GHz 6-channel
Receiver: 6-channel 2-in-1 board
Video Transmitter: 5.8GHz
Output Power: 200mW VTX 8-channel
Flight Controller: Pre-programmed 2-in-1
Battery: 3S 1500mAh LiPO
Flight Time: About 7 minutes
Resolution: 600TVL
Input Voltage: 3.6-5.5V
Memory Card Capacity: Up to 32G
External Video Quality: 640x480p VGA
Internal Video Quality: 1280x720p @ 30FPS
Video Format: AVI
Photo Resolution: 2MP
Receiver/Monitor
Monitor: 4.3″ (109mm) color LCD
5.8GHz Receiver: 5 band, 40 channels
Antenna: RP-SMA 3dBi whip
Resolution: 480×272
Format: NTSC/PAL
Memory Card Capacity: Up to 32G
Battery: 1S 3.7V 1400mAh LiPo
Runtime: 1.5 hours
• Everything is included to get you up and FPV’ing
• Solid, durable airframe
• Transmitter has a solid feel to it
• Easy access battery compartment
• Video screen includes fold-out sun shield
• Drone is fast and easy to fly
• Three flight modes for different skill levels
• Onboard or monitor video recording
• Modular design for easy repairs
• Low voltage warning beeps
• Directional lighting – white front, red rear
• Auto-Shut Off Mode
• Auto-shut off mode
• Goggles are bulky
• No charger for the monitor
Conclusion
The RISE Vusion Extreme FPV Race Pack is a solid solution for those wanting to dip their feet into FPV racing. The fact that everything is included is awesome and other than the goggles being a little bulky, I think it’s a great beginning setup. The 3S pack keeps the drone airborne for a good 7-8 minutes, the camera is great and love that it captures the video (and pictures) to an onboard Micro SD. Drop the monitor into the goggles and you’re set to kill it FPV-style. I’m also giving it great marks for durability; I’ve hit trees, limbs and sent it freefalling from a pretty substantial height and other than a slightly cracked camera housing, the Vusion is still providing hours of entertainment.
Features: 9.5
Appearance: 10
Performance – Speed: 8
Performance – Handling: 9
Video / Picture Quality: 9
Overall Value: 9.5
Connect
RISE, www.Explore-Rise.com
Hobbico, www.Hobbico.com
Gallery
 CompetitionX CompetitionX is the most up-to-date source for RC Car News, Reviews and Videos for Radio Control. We also have the most comprehensive Manual Database on the web.




Just a few comments from a grammar Nazi 😉
It’s = it is. You should use its, not it’s.
In the last paragraph, you say “contribute” when you mean “attribute”, and you say “reign” when you mean “rain”.
Other than that, very good and useful review!
Ya, it’s not often I make these kinds of mistakes but it does happen. I attribute it to finishing this article up late at night and then skimming through it quickly … that sometimes creates errors that I just don’t see.
Thanks for catching these – I made the changes.
Need the top bord on rise drone. The electric chip cought fire how do I find a replacement
Horizon Hobbies has taken over all the Hobbico product, which includes RISE (and the Vusion). I would start by contacting HH customer service and see if they have any replacement parts for it. Good luck!